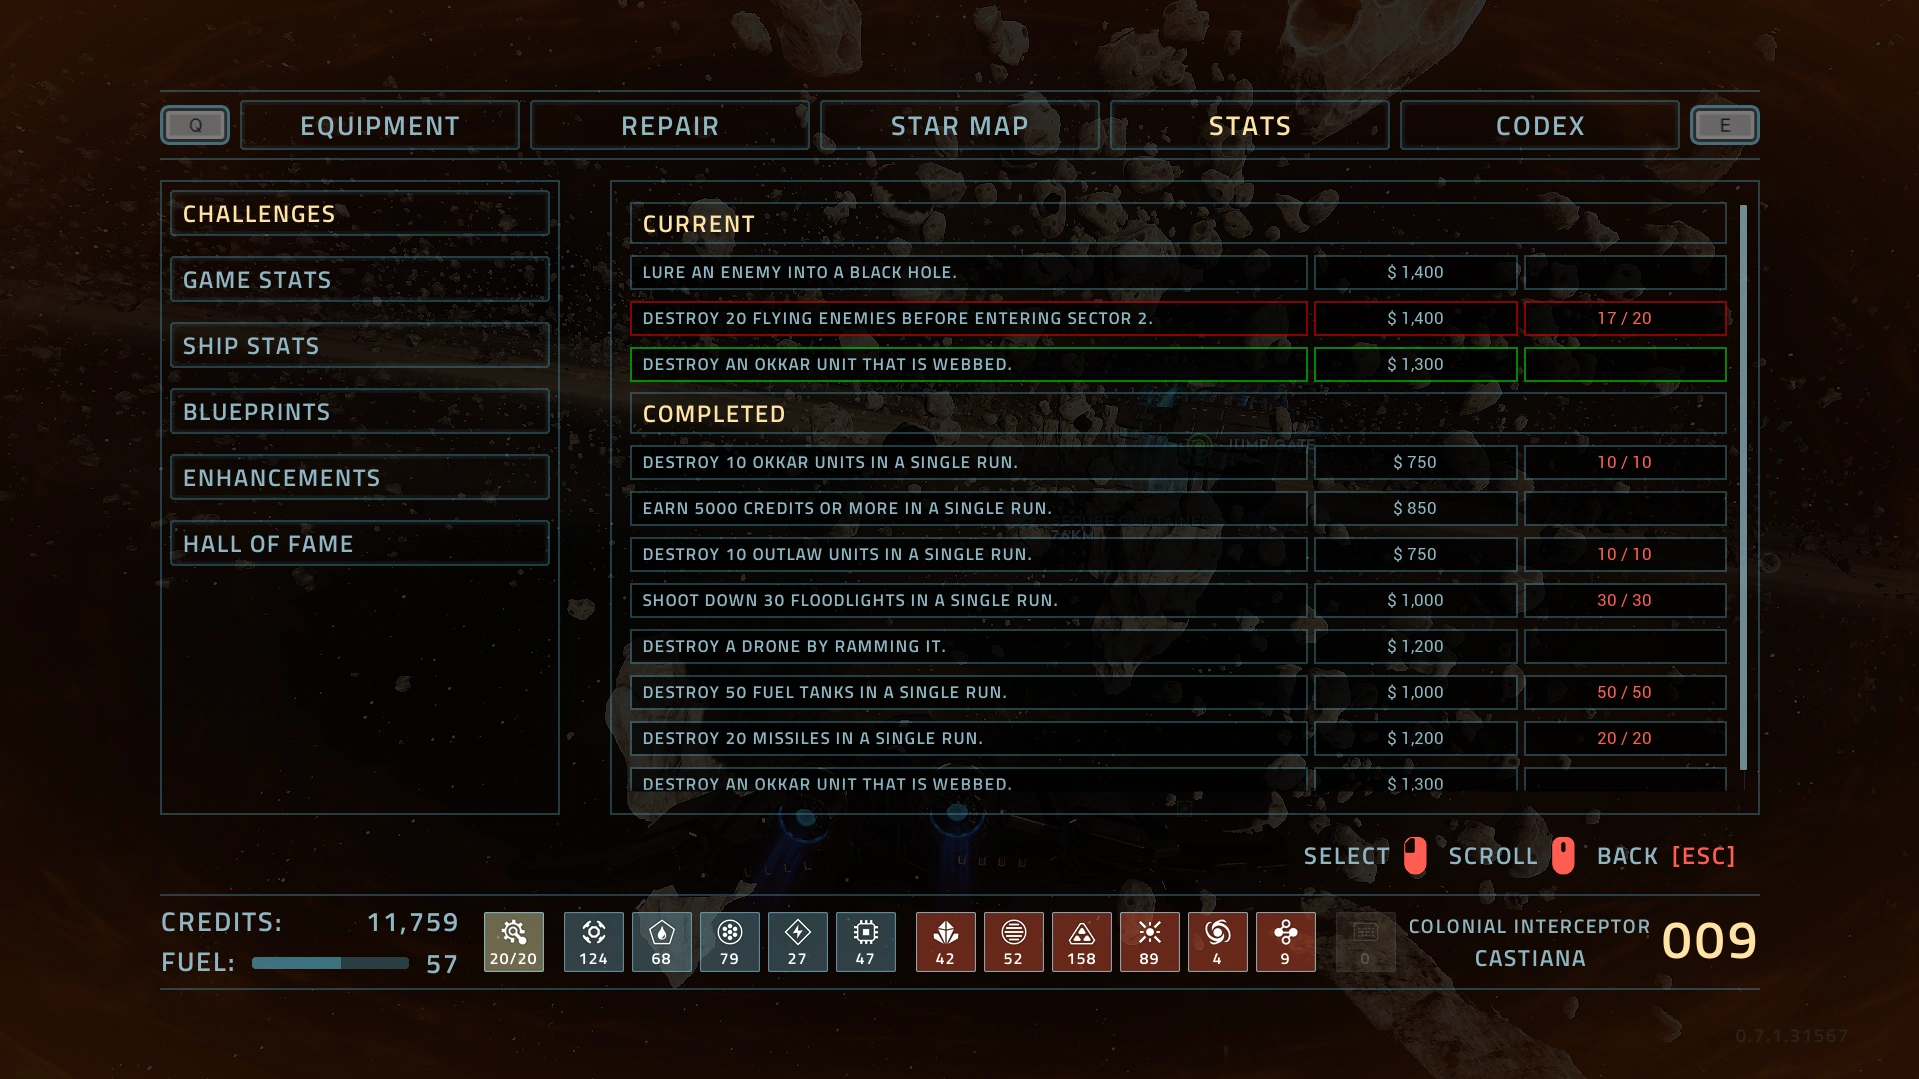
Special Challenges are given at the start of each run, up to a maximum of three available challenges.
In-Game UI.
Each challenge awards credits upon completion, and can only be completed once. Challenges awarding the least amount of credits are given the earliest – in case of two challenges worth the same amount and only one finished challenge, it is not confirmed if they are chosen randomly or one takes priority. Completing all challenges awards the Getting Sidetracked Achievement.
List of Challenges
| Description | Credit Reward | Notes |
|---|---|---|
| Destroy 10 outlaw units in a single run. | $750 | |
| Destroy 10 Okkar units in a single run. | $750 | |
| Earn 5,000 credits or more in a single run. | $850 | |
| Shoot down 30 floodlights in a single run. | $1,000 | Any floodlight counts: from stations, frigates, or cargo transports. You can shoot floodlights on G&B freighters, just make sure you only hit the light. |
| Destroy 50 fuel tanks in a single run. | $1,000 | Any fuel tank counts, even ones that don't drop fuel. G&B or derelict mining stations usually have plenty of them. |
| Destroy 20 missiles in a single run. | $1,200 | Easy to do in front of missile turrets. Just camp one with any fairly accurate weapon such as the Pulse Laser and shoot the missiles. |
| Destroy a drone by ramming it. | $1,200 | Just find a weak drone, kill all other enemies around and try to ram it. Easier with a faster ship, or use Stasis Missiles or a Webber Drone. Brace for damage, though. |
| Destroy an Okkar unit that is webbed. | $1,300 | Stasis Missile or Webber Drone needed. Using a spawned Outlaw Webber drone is more difficult but possible. |
| Lure an enemy into a black hole. | $1,400 | Somewhat tricky. Find a black hole, get the attention of an enemy and try to lure them into the black hole by going on the opposite side of the one they are on. |
| Destroy 20 flying enemies before entering Sector 2. | $1,400 | You only have 3 zones, but every flying enemy counts. If you don't find enough, try waiting for Okkar reinforcements. |
| Make G&B forces attack the Okkar. | $1,500 | Hide behind a G&B freighter escorted with fighters from Okkar shots. The G&B fighters will retaliate. |
| Craft 5 modifications in a single run. | $1,500 | Modifications: only count crafting mods to primary weapons or devices, not crafting secondary weapons or consumables |
| Destroy all of a freighter's containers before it explodes. | $1,500 | Lure its G&B escorts away to kill them. Try not to directly attack the freighter (it will jump away). Choose one with fewer containers (6 or so). A Time Extender also helps. |
| Reach Sector 2 without taking hull damage. | $1,700 | Very hard with the Colonial Gunship unless you jump immediately each zone. The Colonial Scout is recommended, as it is good for dodging, and the Shock Rifle allows you to destroy enemies without them detecting you. |
| Destroy an Elite G&B fighter. | $2,000 | G&B ships are fairly strong, especially elites (marked with a skull). Make sure you do this when not surrounded by tons of G&B forces, as they'll be provoked. |
| Survive a warship attack. | $2,200 | Let Okkar forces arrive. After several waves of various ships, gigantic Colonial Warships will warp in. They have health bars but are unkillable, and possess powerful weapons. Hide behind cover, and warp away. |
| Make 10 deals with the Trader in a single run. | $2,200 | Will only count deals with a Trader ship, not with Service Stations. |
| Destroy an outlaw sniper. | $2,300 | An immobile cloaked ship. Look for an unknown red laser shooting at you and fire at the source. |
| Reach Sector 4 without destroying any ships or drones. | $2,500 | The Ancient Warden counts as a ship, but turrets do not. The Headstart and Ancient Structures Glyphs may be helpful. |
| Destroy an Okkar Corvette. | $3,000 | Drone Overrides will allow you to get past the corvette's shield much more easily. ARC-9000s and Corrosive Missiles also help a lot. |
| Leave the first location without any equipment installed. Then reach Sector 3. | $3,000 | The final challenge. Keep equipment while exploring the first, but salvage before jumping. You can pick up and craft new equipment after that. The Headstart Glyph can make this easier. |