 |
Colonial Gunship
|
Heavy Fighter-Class
|
The Colonial Gunship is a clunky beast to maneuver but it can take a lot of hits. Its reinforced hull provides the best protection available though this comes with a weak spot: It is not possible to equip a shield device. The front shield generator and a powerful turret provide remedy. |
Hull Hitpoints 1090 Armour 35% Shield Hitpoints 0 Shield Recharge Rate 0/s Energy Core Capacity 140 Energy Core Recharge Rate 6/s Max Number of Jumps 4 Jump Charge Duration 6s Primary Weapon Slots 2 Secondary Weapon Slots 2 Device Slots 3 Consumable Slots 3 Cruise Speed 110m/s Boost Speed 258.5m/s Sensor Strength 100% |
| For the subclass in Everspace 2, see Gunship (ES2). |
| “ | Gunships are big, I appreciate the simplicity of that. | „ |
| ~ Hero on the Gunship |
The Colonial Gunship is a Heavy Fighter Class ship. It is the largest player ship in the game and boasts the highest hitpoints and energy capacity. It is also the only vessel capable of utilizing turrets and front shield generators, in order to compensate for sluggish speed and a lack of conventional shields. The Gunship costs $10,000 Credits to unlock and $276,650 to fully max out its Perks.
Loadouts[ | ]
Loadout A[ | ]
- Fusion Blaster
- Flak Cannon
- Heavy Missile x10
- Mine Cluster x5
- Gatling Turret
- Damage Limiter x2
- Combat Drone x4
Loadout B[ | ]
Unlocked by reaching sector 4 with the Gunship.
- Pulse Laser
- Scatter Gun 2880
- Light Missile x20
- ARC-9000
- Laser Turret
- Damage Limiter x2
- Webber Drone x4
Loadout C[ | ]
Unlocked by reaching Sector 7 with the Gunship.
- Beam Laser M3
- Gatling
- Corrosion Missile x8
- Mine Cluster x5
- Front Shield Generator
- Anti-Missile Drone x4
- Nano Injector x2
Tips and Tricks[ | ]
- The Energized Boost device is a great way to speed up exploration of a zone, and it has no downsides on the Gunship.
- The unique Front Shield Generator device is your best friend - use it often, especially when recharging energy while stationary.
- The lightning field natural hazard is very beneficial to the gunship, as it only damages shields, but recharges energy.
- It can be fairly difficult for the Gunship to get Dark Matter and Dark Energy from black holes, but it is doable (especially with maxed perks). Pick one of the resources to grab and boost towards it, while constantly turning your ship/crosshair away from the black hole (but with an arc that will still get you the resources) and you should be able to get it. If you find yourself slipping in, you can craft an emergency Energized Boost to get out.
Loadouts[ | ]
- A: The first loadout of the gunship has the most raw firepower of the three. Its Fusion Blaster will melt right through shields, making Okkar units a breeze, and the Flak Cannon counts as an explosive weapon for mining, so it will instantly extract all resources like a Light Missile would, so it makes up for its slow speed when exploring somewhat. It comes with 4 Combat Drones; you can upgrade drones in the gunship perk tree to give them armor and shields, as well as have more active at once. This can make the Gunship A loadout really really tough in the mid-game of Hardcore mode if you decide to hold on to them, and makes the A loadout very strong in the normal mode. It carries 10 Heavy Missiles, which can one-shot many of the fighters and drones in the game, including a lot of Elite enemies. It also has a stack of Mine Clusters which can be difficult to use but are pretty potent against larger targets, particularly Corvettes. You'll want to use the Damage Limiters when fighting 3 or more foes, as the Gunship struggles to evade incoming shots, especially when its speed is not upgraded. The Gatling Turret has fairly limited range, so you'll want to close in to make the most of it.
- B: The B loadout is more well-rounded, using a Pulse Laser to bring shields down at range and a Scatter Gun 2880 to finish off hulls up close. It's the only loadout in the game that starts with an Arc-9000, so if you find yourself totally outnumbered and overwhelmed or against an early corvette it has an out. 20 Light Missiles speed up the process of mining and killing Okkar fighters, and it has a Laser Turret, which has a noticeably longer range than the Gatling Turret does. 4 Webber Drones help make the most of the Scatter 2880 against enemy fighters and help a lot against Light G&B Fighters if you've decided to anger them. Like the A, it carries 2 Damage Limiters as well.
- C: A bit of an oddball, the C variant starts with an M3 Laser Beam and Gattling, both of which need to charge up before firing. This leaves you without a dedicated anti-shield weapon at first, and very slow at mining and opening containers in Hardcore mode. It also doesn't start with a turret. However, this loadout starts with a Front Shield Generator and 4 Anti Missile Drones, giving the slow ship some much-needed defense in the early sectors, making it a good choice for pilots that find they struggle to get started in the gunship without an early Front Shield Generator. 8 Corrosion Missiles and 5 Mine Clusters make it really potent against larger targets in the early sectors as well, and the Anti Missile drones and Front Shield make it very easy to fight the G&B with the M3 Laser Beam. Finally, it starts with 2 Nano Injectors, so lost hull is easy to replace, allowing you to save up your nanobots for later.
User-Submitted Builds[ | ]
| Gunship (Grendal27) |
|---|
[[File:]] Loadout
A. The Flak Cannon is super easy to use for all-purpose combat, and the Fusion Blaster is great for taking down shields. Heavy Missiles one-shot most fighters, or get them low enough that you can easily take them out with the flak cannon, so I save them for tougher fights usually. Drones are great for distracting enemies as they are focused, so you can take out the enemy while they attack your drone. The bad thing about this loadout is the Gatling Turret, which I replace with the Missile Turret asap. I find that the missile turret is a lot more reliable in fights, helping to end them a lot faster, which means less damage taken. Enhancements
Bonus Equipment:
Things to get in-run:
|
Achievements[ | ]
- Maxing out all perks for the Gunship is one of the possible criteria for unlocking the Tinkerer achievement.
- Using the Gunship for 15 runs will unlock the Slow and Sturdy achievement. Each run will still count for the achievement even if they are a loss.
Trivia[ | ]
- According to the official artbook, the Gunship is 17.7 meters long (front to back).
Gallery[ | ]

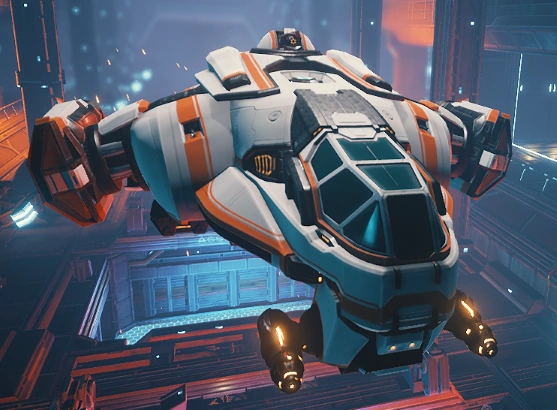
An unupgraded Gunship in-run.

An upgraded Gunship in-run.

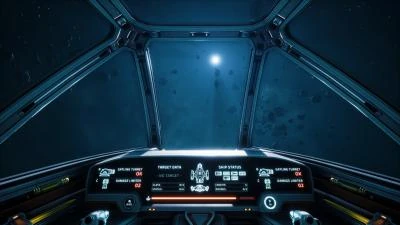
The Cockpit view in a Gunship.