No edit summary |
(→Passive Devices: replaced table with linkboxes) |
||
| (47 intermediate revisions by 5 users not shown) | |||
| Line 1: | Line 1: | ||
| − | {{stub}} |
||
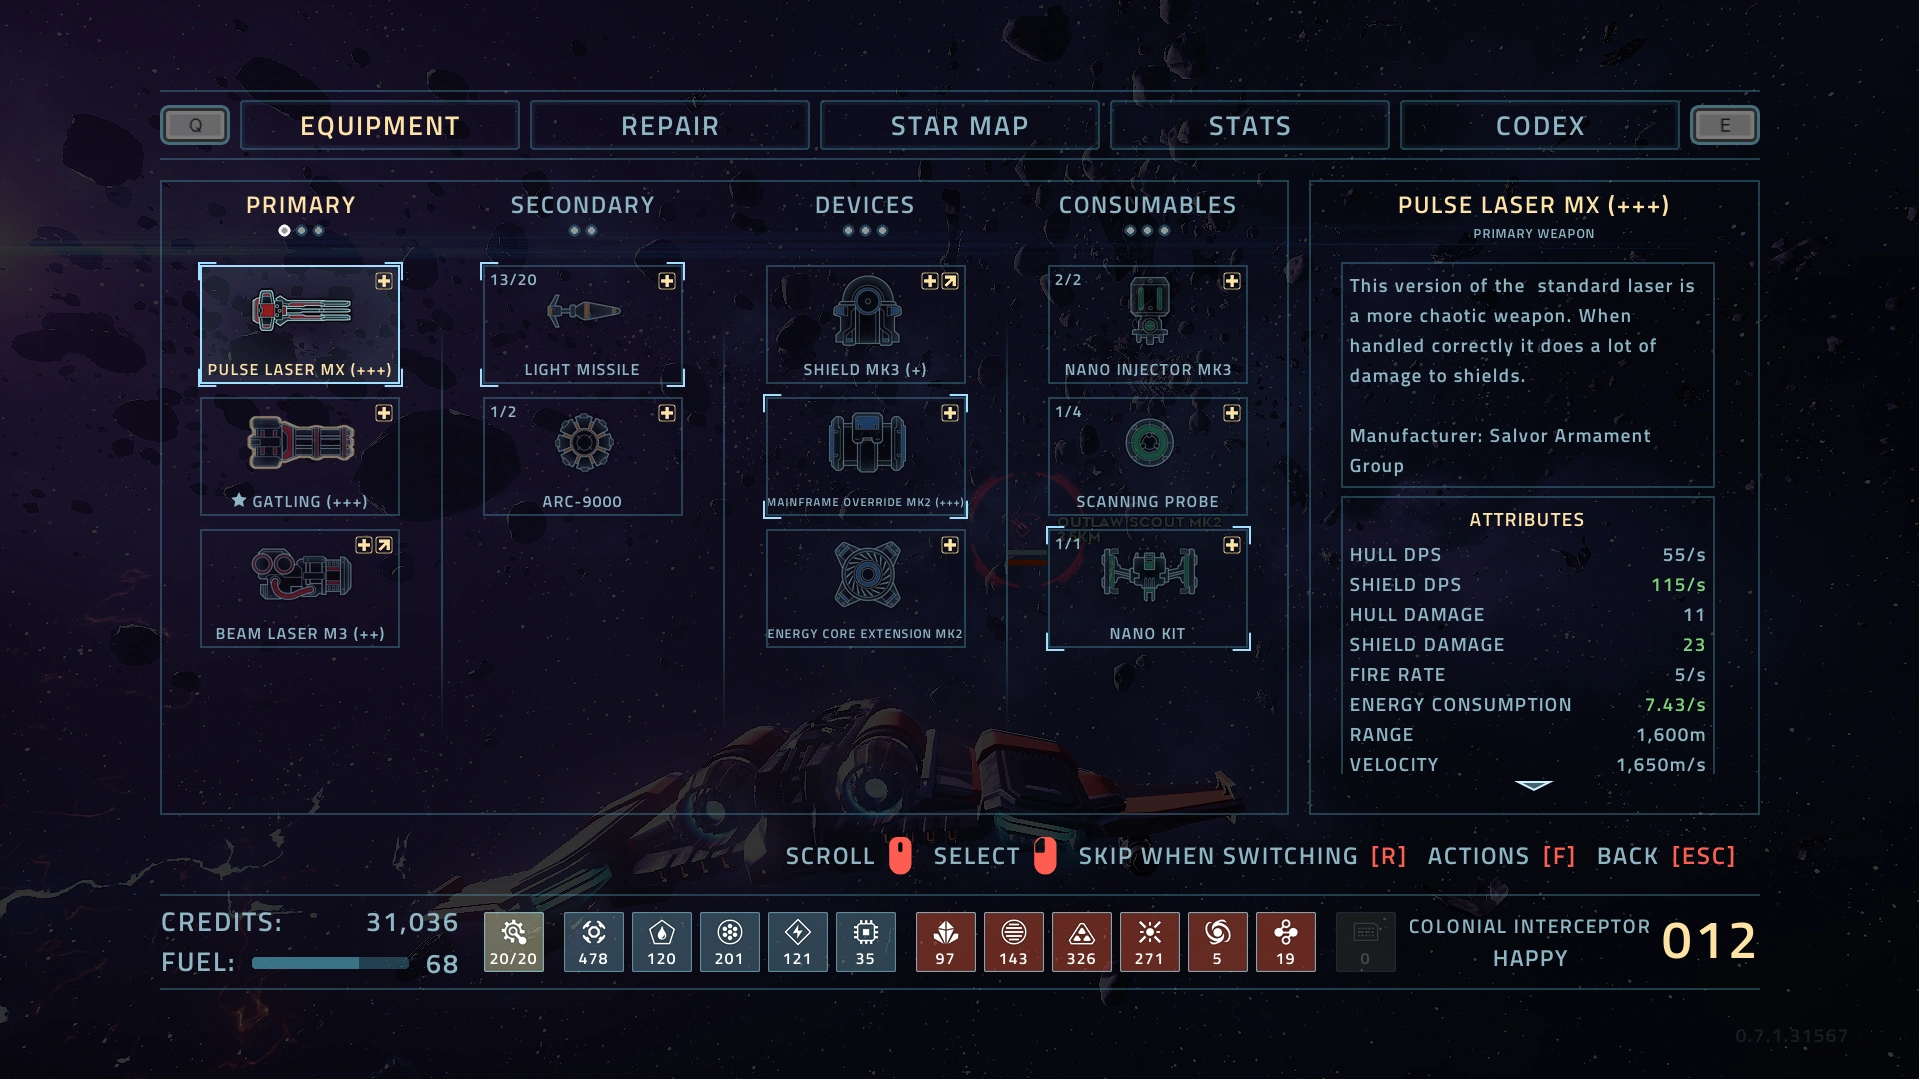
[[File:Everspace-Equipment-UI.png|thumb|500px|The Equipment UI in-game, showing many examples of equipment.]] |
[[File:Everspace-Equipment-UI.png|thumb|500px|The Equipment UI in-game, showing many examples of equipment.]] |
||
| + | {{DisambigMsg|equipment from Everspace|equipment from [[Everspace 2]]|Equipment (ES2)}} |
||
| − | '''Equipment''' can be [[crafting|crafted]] using [[resources]], found in [[containers]], dropped from destroyed enemies, or bought from [[Trader|traders]] and [[Service Station|Service Stations]]. There are 5 types of equipment, [[Equipment#Primary Weapons|primary weapons]], [[Equipment#Secondary Weapons|secondary weapons]], [[Equipment#Devices|devices]], [[Equipment#Consumables|consumables]], and [[Equipment#Mods|mods]]. |
||
| + | '''Equipment''' can be [[crafting|crafted]] using [[resources]], found in [[containers]], dropped from destroyed enemies, or bought from [[Trader|traders]] and [[Service Station|Service Stations]]. There are 6 types of equipment: [[Equipment#Primary Weapons|primary weapons]], [[Equipment#Secondary Weapons|secondary weapons]], [[Equipment#Devices|devices]], [[Equipment#Consumables|consumables]], [[Equipment#Mods|mods]], and [[Equipment#Enhancements|Enhancements]]. |
||
| + | :''Note: The Resources stated in the pages for each equipment type for crafting is without any level in the [[Perks#Crafting Costs|Crafting Costs Perk]].'' |
||
| + | {{tocright}} |
||
| + | == Starting Equipment == |
||
| + | Each class of ship has three loadouts (A, B, and C) of equipment that are unlocked as the player progresses through sectors. See [[Player ships| player ships]] for more information. |
||
| + | Additionally, the [[Perks#Bonus Equipment|Bonus Equipment]] perk can be bought which allows choosing a few different options of random extra starting equipment. |
||
| + | == Enhanced Equipment == |
||
| − | ''Note: These lists are not complete. Please help expand them with any equipment modules you find!'' |
||
| + | Rarely, '''enhanced''' primary weapons and devices can be found, which are marked with a star and have random stat bonuses. When floating in space as loot, they are surrounded by a circular pattern similar to access keys. This is not to be confused with [[Enhancements]], which are a different type of equipment and are explained below. |
||
| + | Eligible equipment can also be enhanced by [[Throng]] for viridian energy. |
||
| − | ''Note 2: The Resources stated in the pages for each equipment type for crafting is without any level in the [[Perks#Crafting Costs|Crafting Costs Perk]].'' |
||
| + | ==Primary Weapons== |
||
| + | Primary weapons are the primary equipment at your disposal in Everspace. There is a total of 24 unique primary weapons, each with their own strengths and weaknesses. Use of primary weapons pulls from the ship's energy pool. Before they got their official names during development, all variants of the base-game weapons were named with numbers (Ex: Gatling II or Beam Laser II). |
||
| + | <div class="info-flex"> |
||
| + | {{Linkbox |
||
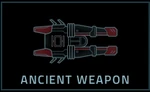
| + | | image = Everspace-PrimaryWeapon-AncientRifle-NewIcon.png |
||
| + | | link = Ancient Weapon |
||
| + | | name = Ancient Weapon |
||
| + | }} |
||
| + | {{Linkbox |
||
| − | {{tocright}} |
||
| + | | image = PriWeapon-Icon-BeamLaser.png |
||
| + | | link = Beam Laser |
||
| + | | name = Beam Laser |
||
| + | }} |
||
| + | {{Linkbox |
||
| − | == Starting Equipment == |
||
| + | | image = PriWeapon-Icon-BeamLaserM3.png |
||
| − | Each class of ship has three loadouts (A,B,C) of equipment that are unlocked as the player progresses through sectors. See [[:Category:Player ships| player ships]] for more information. |
||
| + | | link = Beam Laser M3 |
||
| + | | name = Beam Laser M3 |
||
| + | }} |
||
| + | {{Linkbox |
||
| − | Additionally, you can buy the [[Perks#Bonus Equipment|Bonus Equipment]] perk which will allow you to choose a few different options of random extra starting equipment. |
||
| + | | image = PriWeapon-Icon-CoilGun.png |
||
| + | | link = Coil Gun |
||
| + | | name = Coil Gun |
||
| + | }} |
||
| + | {{Linkbox |
||
| − | ==Primary Weapons== |
||
| + | | image = PriWeapon-Icon-CoilGunT1.png |
||
| − | {|class="wikitable" |
||
| + | | link = Coil Gun T-1 |
||
| − | | [[Beam Laser]] || [[Beam Laser II|Beam Laser M3]] |
||
| + | | name = Coil Gun T-1 |
||
| − | |- |
||
| + | }} |
||
| − | | [[Coil Gun]] || [[Coil Gun II|Coil Gun T-1]] |
||
| + | |||
| − | |- |
||
| + | {{Linkbox |
||
| − | | [[Flak Cannon]] || [[Flak Cannon II|Flak Cannon 5-5]] |
||
| + | | image = PriWeapon-Icon-FlakCannon.png |
||
| − | |- |
||
| + | | link = Flak Cannon |
||
| − | | [[Fusion Blaster]] || [[Fusion Blaster II|Fusion Blaster M6-A]] |
||
| + | | name = Flak Cannon |
||
| − | |- |
||
| + | }} |
||
| − | | [[Gatling]] || [[Gatling II|Gatling 40mm]] |
||
| + | |||
| − | |- |
||
| + | {{Linkbox |
||
| − | | [[Pulse Laser]] || [[Pulse Laser II|Pulse Laser MX]] |
||
| + | | image = PriWeapon-Icon-FlakCannon5-5.png |
||
| − | |- |
||
| + | | link = Flak Cannon 5-5 |
||
| − | | [[Scatter Gun]] || [[Scatter Gun II|Scatter Gun 2880]] |
||
| + | | name = Flak Cannon 5-5 |
||
| − | |- |
||
| + | }} |
||
| − | | [[Shock Rifle]] || [[Shock Rifle II|Shock Rifle PRO]] |
||
| + | |||
| − | |- |
||
| + | {{Linkbox |
||
| − | | [[Thermo Gun]] || [[Thermo Gun II|Thermo Gun X10]] |
||
| + | | image = PriWeapon-Icon-FusionBlaster.png |
||
| − | |} |
||
| + | | link = Fusion Blaster |
||
| + | | name = Fusion Blaster |
||
| + | }} |
||
| + | |||
| + | {{Linkbox |
||
| + | | image = PriWeapon-Icon-FusionBlasterM6-A.png |
||
| + | | link = Fusion Blaster M6-A |
||
| + | | name = Fusion Blaster M6-A |
||
| + | }} |
||
| + | |||
| + | {{Linkbox |
||
| + | | image = PriWeapon-Icon-Gatling.png |
||
| + | | link = Gatling |
||
| + | | name = Gatling |
||
| + | }} |
||
| + | |||
| + | {{Linkbox |
||
| + | | image = PriWeapon-Icon-Gatling40mm.png |
||
| + | | link = Gatling 40mm |
||
| + | | name = Gatling 40mm |
||
| + | }} |
||
| + | |||
| + | {{Linkbox |
||
| + | | image = PriWeapon-Icon-GooGun.png |
||
| + | | link = Goo Gun |
||
| + | | name = Goo Gun |
||
| + | }} |
||
| + | |||
| + | {{Linkbox |
||
| + | | image = PriWeapon-Icon-LightningGun.png |
||
| + | | link = Lightning Gun |
||
| + | | name = Lightning Gun |
||
| + | }} |
||
| + | |||
| + | {{Linkbox |
||
| + | | image = PriWeapon-Icon-NeutronCannon.png |
||
| + | | link = Neutron Cannon |
||
| + | | name = Neutron Cannon |
||
| + | }} |
||
| + | |||
| + | {{Linkbox |
||
| + | | image = PriWeapon-Icon-PlasmaThrower.png |
||
| + | | link = Plasma Thrower |
||
| + | | name = Plasma Thrower |
||
| + | }} |
||
| + | |||
| + | {{Linkbox |
||
| + | | image = PriWeapon-Icon-PulseLaser.png |
||
| + | | link = Pulse Laser |
||
| + | | name = Pulse Laser |
||
| + | }} |
||
| + | |||
| + | {{Linkbox |
||
| + | | image = PriWeapon-Icon-PulseLaserMX.png |
||
| + | | link = Pulse Laser MX |
||
| + | | name = Pulse Laser MX |
||
| + | }} |
||
| + | |||
| + | {{Linkbox |
||
| + | | image = PriWeapon-Icon-PulseLaserKS.png |
||
| + | | link = Pulse Laser KS |
||
| + | | name = Pulse Laser KS |
||
| + | }} |
||
| + | |||
| + | {{Linkbox |
||
| + | | image = PriWeapon-Icon-ScatterGun.png |
||
| + | | link = Scatter Gun |
||
| + | | name = Scatter Gun |
||
| + | }} |
||
| + | |||
| + | {{Linkbox |
||
| + | | image = PriWeapon-Icon-ScatterGun2880.png |
||
| + | | link = Scatter Gun 2880 |
||
| + | | name = Scatter Gun 2880 |
||
| + | }} |
||
| + | |||
| + | {{Linkbox |
||
| + | | image = PriWeapon-Icon-ShockRifle.png |
||
| + | | link = Shock Rifle |
||
| + | | name = Shock Rifle |
||
| + | }} |
||
| + | |||
| + | {{Linkbox |
||
| + | | image = PriWeapon-Icon-ShockRiflePRO.png |
||
| + | | link = Shock Rifle PRO |
||
| + | | name = Shock Rifle PRO |
||
| + | }} |
||
| + | |||
| + | {{Linkbox |
||
| + | | image = PriWeapon-Icon-ThermoGun.png |
||
| + | | link = Thermo Gun |
||
| + | | name = Thermo Gun |
||
| + | }} |
||
| + | |||
| + | {{Linkbox |
||
| + | | image = PriWeapon-Icon-ThermoGunX10.png |
||
| + | | link = Thermo Gun X10 |
||
| + | | name = Thermo Gun X10 |
||
| + | }} |
||
| + | </div> |
||
==Secondary Weapons== |
==Secondary Weapons== |
||
| + | Secondary weapons are powerful, single-use weapons. Due to their limited nature, secondary weapons are best used as a complement to primary weapons or saved to be used for getting out of a tight spot, or against high hit point capital ships. Most secondary weapons can be carried in several salvos, but the max capacity of each weapon varies. There is a total of 10 secondary weapons. |
||
| − | * [[ARC-9000]] |
||
| + | |||
| − | * [[Corrosion Missile]] |
||
| + | <div class="info-flex"> |
||
| − | * [[Heavy Missile]] |
||
| + | {{Linkbox |
||
| − | * [[Light Missile]] |
||
| + | | image = SecWeapon-Icon-ARC9000.png |
||
| − | * [[Mine Cluster]] |
||
| + | | link = ARC-9000 |
||
| − | * [[Plasma Torpedo]] |
||
| + | | name = ARC-9000 |
||
| − | * [[Shield Breaker Missile]] |
||
| + | }} |
||
| − | * [[Stasis Missile]] |
||
| + | |||
| + | {{Linkbox |
||
| + | | image = SecWeapon-Icon-CorrosionMissile.png |
||
| + | | link = Corrosion Missile |
||
| + | | name = Corrosion Missile |
||
| + | }} |
||
| + | |||
| + | {{Linkbox |
||
| + | | image = SecWeapon-Icon-DestabilizerMissile.png |
||
| + | | link = Destabilizer Missile |
||
| + | | name = Destabilizer Missile |
||
| + | }} |
||
| + | |||
| + | {{Linkbox |
||
| + | | image = SecWeapon-Icon-HeavyMissile.png |
||
| + | | link = Heavy Missile |
||
| + | | name = Heavy Missile |
||
| + | }} |
||
| + | |||
| + | {{Linkbox |
||
| + | | image = SecWeapon-Icon-LightMissile.png |
||
| + | | link = Light Missile |
||
| + | | name = Light Missile |
||
| + | }} |
||
| + | |||
| + | {{Linkbox |
||
| + | | image = SecWeapon-Icon-MineCluster.png |
||
| + | | link = Mine Cluster |
||
| + | | name = Mine Cluster |
||
| + | }} |
||
| + | |||
| + | {{Linkbox |
||
| + | | image = SecWeapon-Icon-PlasmaTorpedo.png |
||
| + | | link = Plasma Torpedo |
||
| + | | name = Plasma Torpedo |
||
| + | }} |
||
| + | |||
| + | {{Linkbox |
||
| + | | image = SecWeapon-Icon-SeekerMissileBattery.png |
||
| + | | link = Seeker Missile Battery |
||
| + | | name = Seeker Missile Battery |
||
| + | }} |
||
| + | |||
| + | {{Linkbox |
||
| + | | image = SecWeapon-Icon-ShieldBreakerMissile.png |
||
| + | | link = Shield Breaker Missile |
||
| + | | name = Shield Breaker Missile |
||
| + | }} |
||
| + | |||
| + | {{Linkbox |
||
| + | | image = SecWeapon-Icon-StasisMissile.png |
||
| + | | link = Stasis Missile |
||
| + | | name = Stasis Missile |
||
| + | }} |
||
| + | </div> |
||
==Devices== |
==Devices== |
||
| + | Devices are tools with unique effects which can be used to change to course of battle or to aid in exploration. Devices draw from the ship's energy pool by two different methods. Passive devices are always active but reserve a set pool of energy for as long as they are installed. Active devices use up an immediate burst of energy for each usage by the player. There are 30 unique devices, some of which have upgraded versions for a total of 84 devices. |
||
=== Active Devices === |
=== Active Devices === |
||
| + | There are 20 unique but 54 total active devices. |
||
| − | {|class="wikitable" |
||
| + | <div class="info-flex"> |
||
| − | | [[Cloak]] || [[Cloak MK2]] || [[Cloak MK3]] |
||
| + | {{Linkbox |
||
| − | |- |
||
| + | | image = Device-Icon-Cloak.png |
||
| − | | [[Energized Boost]] || [[Energized Boost MK2]] || [[Energized Boost MK3]] |
||
| + | | link = Cloak |
||
| − | |- |
||
| + | | name = Cloak |
||
| − | | [[Energy Discharger]] || [[Energy Discharger MK2]] || [[Energy Discharger MK3]] |
||
| + | }} |
||
| − | |- |
||
| + | |||
| − | | [[Front Shield Generator]] || [[Front Shield Generator MK2]] || [[Front Shield Generator MK3]] |
||
| + | {{Linkbox |
||
| − | |- |
||
| + | | image = Device-Icon-DecoyGenerator.png |
||
| − | | [[Mainframe Override]] || [[Mainframe Override MK2]] || [[Mainframe Override MK3]] |
||
| + | | link = Decoy Generator |
||
| − | |- |
||
| + | | name = Decoy Generator |
||
| − | | [[Missile Defense System]] || [[Missile Defense System MK2]] || [[Missile Defense System MK3]] |
||
| + | }} |
||
| − | |- |
||
| + | |||
| − | | [[Shield Disruptor]] || [[Shield Disruptor MK2]] || [[Shield Disruptor MK3]] |
||
| + | {{Linkbox |
||
| − | |- |
||
| + | | image = Device-Icon-DroneDisassembler.png |
||
| − | | [[Teleporter]] || [[Teleporter MK2]] || [[Teleporter MK3]] |
||
| + | | link = Drone Disassembler |
||
| − | |- |
||
| + | | name = Drone Disassembler |
||
| − | | [[Time Extender]] || [[Time Extender MK2]] || [[Time Extender MK3]] |
||
| + | }} |
||
| − | |- |
||
| + | |||
| − | | [[Weapon Overdrive]] || [[Weapon Overdrive MK2]] || [[Weapon Overdrive MK3]] |
||
| + | {{Linkbox |
||
| − | |- |
||
| + | | image = Device-Icon-EMPGenerator.png |
||
| − | | [[Gatling Turret]] || [[Laser Turret]] || [[Missile Turret]] |
||
| + | | link = EMP Generator |
||
| − | |} |
||
| + | | name = EMP Generator |
||
| + | }} |
||
| + | |||
| + | {{Linkbox |
||
| + | | image = Device-Icon-EnergizedBoost.png |
||
| + | | link = Energized Boost |
||
| + | | name = Energized Boost |
||
| + | }} |
||
| + | |||
| + | {{Linkbox |
||
| + | | image = Device-Icon-EnergyDischarger.png |
||
| + | | link = Energy Discharger |
||
| + | | name = Energy Discharger |
||
| + | }} |
||
| + | |||
| + | {{Linkbox |
||
| + | | image = Device-Icon-EnergyDiverter.png |
||
| + | | link = Energy Diverter |
||
| + | | name = Energy Diverter |
||
| + | }} |
||
| + | |||
| + | {{Linkbox |
||
| + | | image = Device-Icon-EngineBooster.png |
||
| + | | link = Engine Booster |
||
| + | | name = Engine Booster |
||
| + | }} |
||
| + | |||
| + | {{Linkbox |
||
| + | | image = Device-Icon-FrontShieldGenerator.png |
||
| + | | link = Front Shield Generator |
||
| + | | name = Front Shield Generator |
||
| + | }} |
||
| + | |||
| + | {{Linkbox |
||
| + | | image = Device-Icon-MainframeOverride.png |
||
| + | | link = Mainframe Override |
||
| + | | name = Mainframe Override |
||
| + | }} |
||
| + | |||
| + | {{Linkbox |
||
| + | | image = Device-Icon-MissileDefenseSystem.png |
||
| + | | link = Missile Defense System |
||
| + | | name = Missile Defense System |
||
| + | }} |
||
| + | |||
| + | {{Linkbox |
||
| + | | image = Device-Icon-RemoteEnergyDischarger.png |
||
| + | | link = Remote Energy Discharger |
||
| + | | name = Remote Energy Discharger |
||
| + | }} |
||
| + | |||
| + | {{Linkbox |
||
| + | | image = Device-Icon-ShieldDisruptor.png |
||
| + | | link = Shield Disruptor |
||
| + | | name = Shield Disruptor |
||
| + | }} |
||
| + | |||
| + | {{Linkbox |
||
| + | | image = Device-Icon-StaticDischarger.png |
||
| + | | link = Static Discharger |
||
| + | | name = Static Discharger |
||
| + | }} |
||
| + | |||
| + | {{Linkbox |
||
| + | | image = Device-Icon-Teleporter.png |
||
| + | | link = Teleporter |
||
| + | | name = Teleporter |
||
| + | }} |
||
| + | |||
| + | {{Linkbox |
||
| + | | image = Device-Icon-TimeExtender.png |
||
| + | | link = Time Extender |
||
| + | | name = Time Extender |
||
| + | }} |
||
| + | |||
| + | {{Linkbox |
||
| + | | image = Device-Icon-GatlingTurret.png |
||
| + | | link = Gatling Turret |
||
| + | | name = Gatling Turret |
||
| + | }} |
||
| + | |||
| + | {{Linkbox |
||
| + | | image = Device-Icon-LaserTurret.png |
||
| + | | link = Laser Turret |
||
| + | | name = Laser Turret |
||
| + | }} |
||
| + | |||
| + | {{Linkbox |
||
| + | | image = Device-Icon-MissileTurret.png |
||
| + | | link = Missile Turret |
||
| + | | name = Missile Turret |
||
| + | }} |
||
| + | |||
| + | {{Linkbox |
||
| + | | image = Device-Icon-WeaponOverdrive.png |
||
| + | | link = Weapon Overdrive |
||
| + | | name = Weapon Overdrive |
||
| + | }} |
||
| + | </div> |
||
=== Passive Devices === |
=== Passive Devices === |
||
| + | There are 10 unique but 30 total passive devices. |
||
| − | {|class="wikitable" |
||
| + | <div class="info-flex"> |
||
| − | | [[Energy Core Extension]] || [[Energy Core Extension MK2]] || [[Energy Core Extension MK3]] |
||
| + | {{Linkbox |
||
| − | |- |
||
| + | | image = Device-Icon-AdaptiveArmor.png |
||
| − | | [[Hull Enhancer]] || [[Hull Enhancer MK2]] || [[Hull Enhancer MK3]] |
||
| + | | link = Adaptive Armor |
||
| − | |- |
||
| + | | name = Adaptive Armor |
||
| − | | [[Shield]] || [[Shield MK2]] || [[Shield MK3]] |
||
| + | }} |
||
| − | |- |
||
| + | |||
| − | | [[Shield XC]] || [[Shield XC MK2]] || [[Shield XC MK3]] |
||
| + | {{Linkbox |
||
| − | |- |
||
| + | | image = Device-Icon-DamageConverter.png |
||
| − | | [[Tractor Beam]] || [[Tractor Beam MK2]] || [[Tractor Beam MK3]] |
||
| + | | link = Damage Converter |
||
| − | |} |
||
| + | | name = Damage Converter |
||
| + | }} |
||
| + | |||
| + | {{Linkbox |
||
| + | | image = Device-Icon-EnergyCoreExtension.png |
||
| + | | link = Energy Core Extension |
||
| + | | name = Energy Core Extension |
||
| + | }} |
||
| + | |||
| + | {{Linkbox |
||
| + | | image = Device-Icon-EmergencyShield.png |
||
| + | | link = Emergency Shield |
||
| + | | name = Emergency Shield |
||
| + | }} |
||
| + | |||
| + | {{Linkbox |
||
| + | | image = Device-Icon-SensorRelay.png |
||
| + | | link = Sensor Relay |
||
| + | | name = Sensor Relay |
||
| + | }} |
||
| + | |||
| + | {{Linkbox |
||
| + | | image = Device-Icon-Shield.png |
||
| + | | link = Shield |
||
| + | | name = Shield |
||
| + | }} |
||
| + | |||
| + | {{Linkbox |
||
| + | | image = Device-Icon-ShieldST.png |
||
| + | | link = Shield ST |
||
| + | | name = Shield ST |
||
| + | }} |
||
| + | |||
| + | {{Linkbox |
||
| + | | image = Device-Icon-ShieldXC.png |
||
| + | | link = Shield XC |
||
| + | | name = Shield XC |
||
| + | }} |
||
| + | |||
| + | {{Linkbox |
||
| + | | image = Device-Icon-Target_Decelerator.png |
||
| + | | link = Target Decelerator |
||
| + | | name = Target Decelerator |
||
| + | }} |
||
| + | |||
| + | {{Linkbox |
||
| + | | image = Device-Icon-TractorBeam.png |
||
| + | | link = Tractor Beam |
||
| + | | name = Tractor Beam |
||
| + | }} |
||
| + | </div> |
||
==Consumables== |
==Consumables== |
||
| + | Consumables are powerful one-time use equipment. Despite this shortfall, consumables can mean the difference between life and death. Some consumables can be stocked up for several uses. There are 19 unique but 33 total consumables. |
||
{|class="wikitable" |
{|class="wikitable" |
||
| [[Anti-Missile Drone]] || [[Shield Charge Drone]] || [[Webber Drone]] |
| [[Anti-Missile Drone]] || [[Shield Charge Drone]] || [[Webber Drone]] |
||
|- |
|- |
||
| − | | [[ |
+ | | [[Combat Drone]] || [[Sensor Drone]] || [[Drone Override]] |
|- |
|- |
||
| − | | [[Damage |
+ | | [[Damage Booster]] || [[Damage Booster Mk2]] || [[Damage Booster Mk3]] |
|- |
|- |
||
| + | | [[Damage Limiter]] || [[Damage Limiter Mk2]] || [[Damage Limiter Mk3]] |
||
| − | | [[Drone Override]] |
||
|- |
|- |
||
| − | | [[Energy Injector]] |
+ | | [[Energy Injector]] || [[Energy Injector Mk2]] || [[Energy Injector Mk3]] |
|- |
|- |
||
| + | | [[G&B Distress Beacon]] || [[Tareen Beacon]] || [[Throng Beacon]] |
||
| − | | [[Jump Stabilizer]] |
||
|- |
|- |
||
| + | | [[Shield Booster]] || [[Shield Booster Mk2]] || [[Shield Booster Mk3]] |
||
| − | | [[Nano Kit]] |
||
|- |
|- |
||
| − | | [[Plasma Mine]] |
+ | | [[Plasma Mine]] || [[Plasma Mine Mk2]] || [[Plasma Mine Mk3]] |
|- |
|- |
||
| − | | [[ |
+ | | [[Nano Injector]] || [[Nano Injector Mk2]] || [[Nano Injector Mk3]] |
|- |
|- |
||
| + | | [[Nano Kit]] || [[Nano Extractor]] |
||
| − | | [[Combat Drone]] |
||
| + | |- |
||
| + | | [[Jump Stabilizer]] || [[Plasma-Powered-Jump]] |
||
| + | |- |
||
| + | | [[Turret Override]] || [[Device Charger]] |
||
|} |
|} |
||
| − | |||
==Mods== |
==Mods== |
||
| − | [[Equipment#Primary Weapons|Primary Weapons]] and [[Equipment#Devices|Devices]] can be upgraded in |
+ | [[Equipment#Primary Weapons|Primary Weapons]] and [[Equipment#Devices|Devices]] can be upgraded in the inventory with modifications that upgrade some part of the equipment's stats, but usually with a negative effect as well. There are 15 unique but 34 total modifications. |
| − | === |
+ | === Weapon Mods === |
| − | * [[Critical Hit Chance Mod]] ([[Critical Hit Chance Mod |
+ | * [[Critical Hit Chance Mod]] ([[Critical Hit Chance Mod Mk2|Mk2]], [[Critical Hit Chance Mod Mk3|Mk3]]) |
| − | * [[Energy Consumption Mod (Primary Weapon)]] ([[Energy Consumption Mod ( |
+ | * [[Energy Consumption Mod (Primary Weapon)]] ([[Energy Consumption Mod Mk2 (Primary Weapon)|Mk2]], [[Energy Consumption Mod Mk3 (Primary Weapon)|Mk3]]) |
* [[Fire Rate Mod]] ([[Fire Rate Mod Mk2|Mk2]], [[Fire Rate Mod Mk3|Mk3]]) |
* [[Fire Rate Mod]] ([[Fire Rate Mod Mk2|Mk2]], [[Fire Rate Mod Mk3|Mk3]]) |
||
| − | * [[Hull Damage Mod]] ([[Hull Damage Mod |
+ | * [[Hull Damage Mod]] ([[Hull Damage Mod Mk2|Mk2]], [[Hull Damage Mod Mk3|Mk3]]) |
| + | * [[Randomize Mod]] |
||
| − | * [[Range Mod]] ([[Range Mod MK2|MK2]], [[Range Mod MK3|MK3]]) |
||
| − | * [[ |
+ | * [[Range Mod]] ([[Range Mod Mk2|Mk2]], [[Range Mod Mk3|MK3]]) |
| − | * [[ |
+ | * [[Shield Damage Mod]] ([[Shield Damage Mod Mk2|Mk2]], [[Shield Damage Mod Mk3|Mk3]]) |
| − | * [[ |
+ | * [[Shield Piercing Mod]] ([[Shield Piercing Mod Mk2|Mk2]], [[Shield Piercing Mod Mk3|Mk3]]) |
| + | * [[Spread Mod]] ([[Spread Mod Mk2|Mk2]], [[Spread Mod Mk3|Mk3]]) |
||
| + | * [[Velocity Mod]] ([[Velocity Mod Mk2|Mk2]], [[Velocity Mod Mk3|Mk3]]) |
||
| − | === |
+ | === Device Mods === |
| − | * [[Cooldown Mod]] |
+ | * [[Cooldown Mod]] |
| − | * [[Duration Mod]] |
+ | * [[Duration Mod]] |
| − | * [[Energy Consumption Mod (Device)]] |
+ | * [[Energy Consumption Mod (Device)]] |
| − | * [[Shield Capacity Mod]] |
+ | * [[Shield Capacity Mod]] |
| − | * [[Shield Recharge Delay Mod]] |
+ | * [[Shield Recharge Delay Mod]] |
| − | * [[Shield Shutdown Duration Mod]] |
+ | * [[Shield Shutdown Duration Mod]] |
| + | == Enhancements == |
||
| + | Enhancements upgrade the player's ship with varying effects, often with a negative effect to balance out the positive. Some force or encourage varying or more unique playstyles. There are two types. |
||
| + | *[[Subroutines]], which can be obtained from behind locked doors in derelict [[Colonials#Structures|Colonial]] stations. There are 17 total. |
||
| + | *[[Glyphs]], which can be obtained from opening the monolith in an [[Ancient Depot]]. There are 11 total. |
||
| + | More info [[:Category:Enhancements|Here]] |
||
== Removed Equipment == |
== Removed Equipment == |
||
| − | Currently, only the [[Scanning Probe]] has been removed from the game. |
+ | Currently, only the [[Scanning Probe]] has been removed from the game. Hull Enhancers are now known as [[Adaptive Armor]]. |
| + | |||
| − | [[Category:Equipment]] |
||
| + | [[Category:Equipment| ]] |
||
Revision as of 19:46, 26 May 2021
The Equipment UI in-game, showing many examples of equipment.
| This article is about equipment from Everspace. For equipment from Everspace 2, see Equipment (ES2). |
Equipment can be crafted using resources, found in containers, dropped from destroyed enemies, or bought from traders and Service Stations. There are 6 types of equipment: primary weapons, secondary weapons, devices, consumables, mods, and Enhancements.
- Note: The Resources stated in the pages for each equipment type for crafting is without any level in the Crafting Costs Perk.
Starting Equipment
Each class of ship has three loadouts (A, B, and C) of equipment that are unlocked as the player progresses through sectors. See player ships for more information.
Additionally, the Bonus Equipment perk can be bought which allows choosing a few different options of random extra starting equipment.
Enhanced Equipment
Rarely, enhanced primary weapons and devices can be found, which are marked with a star and have random stat bonuses. When floating in space as loot, they are surrounded by a circular pattern similar to access keys. This is not to be confused with Enhancements, which are a different type of equipment and are explained below.
Eligible equipment can also be enhanced by Throng for viridian energy.
Primary Weapons
Primary weapons are the primary equipment at your disposal in Everspace. There is a total of 24 unique primary weapons, each with their own strengths and weaknesses. Use of primary weapons pulls from the ship's energy pool. Before they got their official names during development, all variants of the base-game weapons were named with numbers (Ex: Gatling II or Beam Laser II).
 |
Ancient Weapon
|
Beam Laser
|
Beam Laser M3
|
Coil Gun
|
Coil Gun T-1
|
Flak Cannon
|
Flak Cannon 5-5
|
Fusion Blaster
|
Fusion Blaster M6-A
|
Gatling
|
Gatling 40mm
|
Goo Gun
|
Lightning Gun
|
Neutron Cannon
|
Plasma Thrower
|
Pulse Laser
|
Pulse Laser MX
|
Pulse Laser KS
|
Scatter Gun
|
Scatter Gun 2880
|
Shock Rifle
|
Shock Rifle PRO
|
Thermo Gun
|
Thermo Gun X10
|
Secondary Weapons
Secondary weapons are powerful, single-use weapons. Due to their limited nature, secondary weapons are best used as a complement to primary weapons or saved to be used for getting out of a tight spot, or against high hit point capital ships. Most secondary weapons can be carried in several salvos, but the max capacity of each weapon varies. There is a total of 10 secondary weapons.
ARC-9000
|
Corrosion Missile
|
Destabilizer Missile
|
Heavy Missile
|
Light Missile
|
Mine Cluster
|
Plasma Torpedo
|
Seeker Missile Battery
|
Shield Breaker Missile
|
Stasis Missile
|
Devices
Devices are tools with unique effects which can be used to change to course of battle or to aid in exploration. Devices draw from the ship's energy pool by two different methods. Passive devices are always active but reserve a set pool of energy for as long as they are installed. Active devices use up an immediate burst of energy for each usage by the player. There are 30 unique devices, some of which have upgraded versions for a total of 84 devices.
Active Devices
There are 20 unique but 54 total active devices.
Cloak
|
Decoy Generator
|
Drone Disassembler
|
EMP Generator
|
Energized Boost
|
Energy Discharger
|
Energy Diverter
|
Engine Booster
|
Front Shield Generator
|
Mainframe Override
|
Missile Defense System
|
Remote Energy Discharger
|
Shield Disruptor
|
Static Discharger
|
Teleporter
|
Time Extender
|
Gatling Turret
|
Laser Turret
|
Missile Turret
|
Weapon Overdrive
|
Passive Devices
There are 10 unique but 30 total passive devices.
Adaptive Armor
|
Damage Converter
|
Energy Core Extension
|
Emergency Shield
|
Sensor Relay
|
Shield
|
Shield ST
|
Shield XC
|
Target Decelerator
|
Tractor Beam
|
Consumables
Consumables are powerful one-time use equipment. Despite this shortfall, consumables can mean the difference between life and death. Some consumables can be stocked up for several uses. There are 19 unique but 33 total consumables.
Mods
Primary Weapons and Devices can be upgraded in the inventory with modifications that upgrade some part of the equipment's stats, but usually with a negative effect as well. There are 15 unique but 34 total modifications.
Weapon Mods
- Critical Hit Chance Mod (Mk2, Mk3)
- Energy Consumption Mod (Primary Weapon) (Mk2, Mk3)
- Fire Rate Mod (Mk2, Mk3)
- Hull Damage Mod (Mk2, Mk3)
- Randomize Mod
- Range Mod (Mk2, MK3)
- Shield Damage Mod (Mk2, Mk3)
- Shield Piercing Mod (Mk2, Mk3)
- Spread Mod (Mk2, Mk3)
- Velocity Mod (Mk2, Mk3)
Device Mods
- Cooldown Mod
- Duration Mod
- Energy Consumption Mod (Device)
- Shield Capacity Mod
- Shield Recharge Delay Mod
- Shield Shutdown Duration Mod
Enhancements
Enhancements upgrade the player's ship with varying effects, often with a negative effect to balance out the positive. Some force or encourage varying or more unique playstyles. There are two types.
- Subroutines, which can be obtained from behind locked doors in derelict Colonial stations. There are 17 total.
- Glyphs, which can be obtained from opening the monolith in an Ancient Depot. There are 11 total.
More info Here
Removed Equipment
Currently, only the Scanning Probe has been removed from the game. Hull Enhancers are now known as Adaptive Armor.