@DeletedUser40610190 (talk | contribs) mNo edit summary |
mNo edit summary |
||
| (133 intermediate revisions by 24 users not shown) | |||
| Line 1: | Line 1: | ||
| + | [[File:Everspace-Perks-UI.png|thumb|455px|Perks screen with [[Colonial Interceptor]] selected.]] |
||
| − | {{stub}} |
||
| + | {{For|perks in ''[[Everspace 2]]''|Perks (ES2)}} |
||
| − | [[File:Perks.jpg|thumb|455px|Perks screen from the Alpha build]] |
||
| − | '''Perks''' can be leveled up prior to a game run using [[credits]]. |
+ | '''Perks''' can be leveled up prior to a game run using [[credits]], and are permanent upgrades across all runs. They affect almost all aspects of each run and how strong each ship is, and with no downsides other than spending credits. Some ship perks even have visual upgrades, changing the look of one of the parts of a ship. For images of the visual changes, please see each respective [[Player ships|ship's]] pages. |
| + | |||
| + | Upgrading all perks in the game costs $1,429,050 (including the [[Colonial Sentinel]]'s perks; $1,186,400 without it). |
||
{{tocright}} |
{{tocright}} |
||
| − | ==Weapons== |
||
| − | There are 4 weapons perks: |
||
| + | == Pilot Perks == |
||
| − | === Primary Weapons Slots (3 levels) === |
||
| + | Pilot perks go across all ship types and affect non-ship specific aspects of each run. There are currently 17 different pilot perks across seven different groups of perks. Maxing out all Pilot perks awards the Perked Up [[Achievements|Achievement]]. In total, maxing out all pilot perks costs $450,600 credits. |
||
| − | In the Colonial Interceptor at first you have 2 slots for [[Equipment#Primary Weapons|primary weapons]]. ''(See chart below)'' |
||
| + | === Critical Hits === |
||
| − | Requirements: Device Slots. |
||
| + | There are two critical hit perks. |
||
| + | ==== [[File:Perks-CritDam.png]] Critical Hit Damage ==== |
||
| − | === Secondary Weapons Slots (3 levels) === |
||
| + | Increases your global hit damage multiplier for all Primary Weapons. You start with a 2x damage multiplier. It has seven levels, and has a total cost of $20,600 credits. |
||
| − | At first you have only 1 slot for [[Equipment|secondary weapons]]. |
||
| − | |||
| − | Requirements: Primary Weapons Slots, Device Slots. |
||
| − | {| class="wikitable" |
||
| − | !Colonial |
||
| − | Interceptor |
||
| − | !Primary |
||
| − | Weapons |
||
| − | !Secondary |
||
| − | Weapons |
||
| − | !Cost |
||
| − | Part1 |
||
| − | !Cost |
||
| − | Part2 |
||
| − | !Cost |
||
| − | Part3 |
||
| − | !Cost |
||
| − | Part4 |
||
| − | !Cost |
||
| − | Part5 |
||
| − | |- |
||
| − | |1st. Level |
||
| − | |3 slots |
||
| − | |2 slots |
||
| − | |$200 |
||
| − | |$400 |
||
| − | |$600 |
||
| − | |$800 |
||
| − | |N/A |
||
| − | |- |
||
| − | |2nd. Level |
||
| − | |4 slots |
||
| − | |3 slots |
||
| − | |$500 |
||
| − | |$800 |
||
| − | |$1,200 |
||
| − | |$1,500 |
||
| − | |$2,000 |
||
| − | |- |
||
| − | |3rd. Level |
||
| − | |5 slots |
||
| − | |4 slots |
||
| − | |$1,000 |
||
| − | |$1,500 |
||
| − | |$2,000 |
||
| − | |$2,500 |
||
| − | |$3,500 |
||
| − | |} |
||
| − | |||
| − | === Critical Hit Damage (7 levels) === |
||
| − | Increases your global hit damage multiplier for all Primary Weapons. You start with 2x. |
||
Requirements: Primary Weapons Slots, Device Slots, Critical Hit Chance. |
Requirements: Primary Weapons Slots, Device Slots, Critical Hit Chance. |
||
{| class="wikitable" |
{| class="wikitable" |
||
| + | ! Level |
||
| − | !Colonial |
||
| + | ! Damage Multipier |
||
| − | Interceptor |
||
| + | ! Cost |
||
| − | !Critical Hit |
||
| − | Damage |
||
| − | !Cost |
||
|- |
|- |
||
| + | | 1 || 2.5x || $300 |
||
| − | |1st. Level |
||
| − | |2.50x |
||
| − | |$500 |
||
|- |
|- |
||
| + | | 2 || 2.75x || $800 |
||
| − | |2nd. Level |
||
| − | |2.75x |
||
| − | |$1,000 |
||
|- |
|- |
||
| + | | 3 || 3x || $1,500 |
||
| − | |3rd. Level |
||
| − | |3x |
||
| − | |$1,500 |
||
|- |
|- |
||
| + | | 4 || 3.5x || $2,500 |
||
| − | |4th. Level |
||
| − | |3.50x |
||
| − | |$2,500 |
||
|- |
|- |
||
| + | | 5 || 4x || $3,500 |
||
| − | |5th. Level |
||
| − | |4x |
||
| − | |$3,500 |
||
|- |
|- |
||
| + | | 6 || 4.5x || $5,000 |
||
| − | |6th. Level |
||
| − | |4.5x |
||
| − | |$5,000 |
||
|- |
|- |
||
| + | | 7 || 5x || $7,000 |
||
| − | |7th. Level |
||
| − | |5x |
||
| − | |$7,000 |
||
|} |
|} |
||
| − | === Critical Hit Chance |
+ | ==== [[File:Perks-CritChance.png]] Critical Hit Chance ==== |
| − | Increases your critical hit chance for all Primary Weapons. |
+ | Increases your critical hit chance for all Primary Weapons. Without this perk, you have a 0% chance. It has ten levels, and has a total cost of $21,100 credits. |
Requirements: Primary Weapons Slots, Device Slots. |
Requirements: Primary Weapons Slots, Device Slots. |
||
{| class="wikitable" |
{| class="wikitable" |
||
| + | ! Level |
||
| − | !Colonial |
||
| + | ! Chance |
||
| − | Interceptor |
||
| + | ! Cost |
||
| − | !Critical Hit |
||
| − | Chance |
||
| − | !Cost |
||
|- |
|- |
||
| + | | 1 || 0.5% || $500 |
||
| − | |1st. Level |
||
| − | |0.5% |
||
| − | |$750 |
||
|- |
|- |
||
| + | | 2 || 1% || $700 |
||
| − | |2nd. Level |
||
| − | |1% |
||
| − | |$1,000 |
||
|- |
|- |
||
| + | | 3 || 1.5% || $900 |
||
| − | |3rd. Level |
||
| − | |1.5% |
||
| − | |$1,250 |
||
|- |
|- |
||
| + | | 4 || 2% || $1,500 |
||
| − | |4th. Level |
||
| − | |2% |
||
| − | |$1,500 |
||
|- |
|- |
||
| + | | 5 || 2.5% || $2,000 |
||
| − | |5th. Level |
||
| − | |2.5% |
||
| − | |$2,000 |
||
|- |
|- |
||
| + | | 6 || 3% || $2,200 |
||
| − | |6th. Level |
||
| − | |3% |
||
| − | |$2,200 |
||
|- |
|- |
||
| + | | 7 || 3.5% || $2,800 |
||
| − | |7th. Level |
||
| − | |3.5% |
||
| − | |$2,800 |
||
|- |
|- |
||
| + | | 8 || 4% || $3,000 |
||
| − | |8th. Level |
||
| − | |4% |
||
| − | |$3,000 |
||
|- |
|- |
||
| + | | 9 || 4.5% || $3,500 |
||
| − | |9th. Level |
||
| − | |4.5% |
||
| − | |$3.500 |
||
|- |
|- |
||
| + | | 10 || 5% || $4,000 |
||
| − | |10th. Level |
||
| − | |5% |
||
| − | |$4,000 |
||
|} |
|} |
||
| − | == |
+ | === Map === |
| + | There is only one perk for upgrading the sector map. |
||
| − | There are 2 engine perks: |
||
| + | ==== [[File:Perks-SectorScan.png]] Sector Scanner ==== |
||
| − | === Max Speed (6 levels) === |
||
| + | Adds additional information to the sector map. It has four levels, with multiple parts to buy to unlock each level, and has a total cost of $18,800 credits. |
||
| − | Increases the maximum speed of your ship. Your starting maximum is 120m/s. |
||
| − | |||
| − | Requirements: Hull Hitpoints. |
||
{| class="wikitable" |
{| class="wikitable" |
||
| + | ! rowspan="2" | Level |
||
| − | !Colonial |
||
| + | ! rowspan="2" | Sector Information |
||
| − | Interceptor |
||
| + | ! colspan="6" | Cost |
||
| − | !Max |
||
| − | Speed |
||
| − | !Cost |
||
| − | |- |
||
| − | |1st. Level |
||
| − | |125m/s |
||
| − | |$700 |
||
|- |
|- |
||
| + | ! Part 1 !! Part 2 !! Part 3 !! Part 4 !! Part 5 !! Total |
||
| − | |2nd. Level |
||
| − | |130m/s |
||
| − | |$1,200 |
||
|- |
|- |
||
| + | | 1 || Shows [[Important locations#Threat levels|threat levels]] on the sector map. || $200 || $400 || $700 || $1,000 || N/A || $2,300 |
||
| − | |3rd. Level |
||
| − | |135m/s |
||
| − | |$2,000 |
||
|- |
|- |
||
| + | | 2 || Shows [[Important locations#Natural hazards|natural hazards]] on the sector map. || $300 || $500 || $800 || $1,200 || $1,700 || $4,500 |
||
| − | |4th. Level |
||
| − | |140m/s |
||
| − | |$3,000 |
||
|- |
|- |
||
| + | | 3 || Shows [[Trader|traders]] on the sector map. || $500 || $700 || $1,000 || $1,400 || $1,900 || $5,500 |
||
| − | |5th. Level |
||
| − | |145m/s |
||
| − | |$5,000 |
||
|- |
|- |
||
| + | | 4 || Shows [[Service Station|Service Stations]] on the sector map. || $700 || $900 || $1,200 || $1,600 || $2,100 || $6,500 |
||
| − | |6th. Level |
||
| − | |150m/s |
||
| − | |$7,000 |
||
|} |
|} |
||
| − | === |
+ | === Resources === |
| + | There are three resource perks: |
||
| − | Increases the speed of your ship while boosting. Your starting boost multiplier is 2.5x |
||
| + | ==== [[File:Perks-CraftCost.png]] Crafting Costs ==== |
||
| − | Requirements: Max Speed, Hull Hitpoints. |
||
| + | Decreases the amount of resources needed for crafting. It has four levels and a total cost of $28,000 credits. |
||
| + | |||
| + | Requirements: Consumable Slots, Device Slots. |
||
{| class="wikitable" |
{| class="wikitable" |
||
| + | ! Level |
||
| − | !Colonial |
||
| + | ! Percent Decrease |
||
| − | Interceptor |
||
| + | ! Cost |
||
| − | !Boost Speed |
||
| − | !Cost |
||
|- |
|- |
||
| + | | 1 || 10% || $4,000 |
||
| − | |1st. Level |
||
| − | |2.6x |
||
| − | |$2,000 |
||
|- |
|- |
||
| + | | 2 || 15% || $6,000 |
||
| − | |2nd. Level |
||
| − | |2.7x |
||
| − | |$3,500 |
||
|- |
|- |
||
| + | | 3 || 20% || $8,000 |
||
| − | |3rd. Level |
||
| − | |2.8x |
||
| − | |$5,000 |
||
|- |
|- |
||
| + | | 4 || 25% || $10,000 |
||
| − | |4th. Level |
||
| − | |2.9x |
||
| − | |$7,000 |
||
| − | |- |
||
| − | |5th. Level |
||
| − | |3x |
||
| − | |$10,000 |
||
|} |
|} |
||
| + | ==== [[File:Perks-MineYield.png]] Mining Yield ==== |
||
| − | ==Sensor== |
||
| + | Increases the amount of resources gained from mining. It has four levels and costs a total of $28,000 credits. |
||
| − | There are 2 sensor perks: |
||
| + | Requirements: Crafting Costs, Consumable Slots, Device Slots. |
||
| − | === Sector Scanner (4 levels) === |
||
| − | Adds additional information to the sector map: |
||
{| class="wikitable" |
{| class="wikitable" |
||
| + | ! Level |
||
| − | !Colonial |
||
| + | ! Percent Increase |
||
| − | Interceptor |
||
| + | ! Cost |
||
| − | !Sector Information |
||
| − | !Cost |
||
| − | Part1 |
||
| − | !Cost |
||
| − | Part2 |
||
| − | !Cost |
||
| − | Part3 |
||
| − | !Cost |
||
| − | Part4 |
||
| − | !Cost |
||
| − | Part5 |
||
|- |
|- |
||
| + | | 1 || 10% || $4,000 |
||
| − | |1st. Level |
||
| − | |Shows [[Important locations#Threat levels|threat levels]] to the map |
||
| − | |$200 |
||
| − | |$400 |
||
| − | |$700 |
||
| − | |$1,000 |
||
| − | |N/A |
||
|- |
|- |
||
| + | | 2 || 15% || $6,000 |
||
| − | |2nd. Level |
||
| − | |Shows [[Important locations#Natural hazards|natural hazards]] on the map |
||
| − | |$300 |
||
| − | |$500 |
||
| − | |$800 |
||
| − | |$1,200 |
||
| − | |$1,700 |
||
|- |
|- |
||
| + | | 3 || 20% || $8,000 |
||
| − | |3rd. Level |
||
| − | |Shows [[trader]] ship on the map |
||
| − | |$500 |
||
| − | |$700 |
||
| − | |$1,000 |
||
| − | |$1,400 |
||
| − | |$1,900 |
||
|- |
|- |
||
| + | | 4 || 25% || $10,000 |
||
| − | |4th. Level |
||
| − | |Shows [[Service Station|Service Stations]] on the map |
||
| − | |$700 |
||
| − | |$900 |
||
| − | |$1,200 |
||
| − | |$1,600 |
||
| − | |$2,100 |
||
|} |
|} |
||
| + | ==== [[File:Perks-BonusResources.png]] Bonus Resources ==== |
||
| − | === Sensor Range (4 levels) === |
||
| + | Lets you start a run with additional random resources on board. It has four levels and costs a total of $24,000 credits. |
||
| − | Increases your [[Components#Sensor|Sensor]]'s range. |
||
| − | Requirements: |
+ | Requirements: Rare Loot Chance, Credit Loot Bonus. |
{| class="wikitable" |
{| class="wikitable" |
||
| + | ! rowspan="2" | Level |
||
| − | !Colonial |
||
| + | ! rowspan="2" | Bonus Resources |
||
| − | Interceptor |
||
| + | ! colspan="6" | Cost |
||
| − | !Sensor |
||
| − | Range |
||
| − | !Cost |
||
|- |
|- |
||
| + | ! Part 1 !! Part 2 !! Part 3 !! Part 4 !! Part 5 !! Total |
||
| − | |1st. Level |
||
| − | |5% |
||
| − | |$1,000 |
||
|- |
|- |
||
| + | | 1 || Add resources worth $500 to your ship || $300 || $500 || $800 || $1,200 || $1,700 || $4,500 |
||
| − | |2nd. Level |
||
| − | |10% |
||
| − | |$3,000 |
||
|- |
|- |
||
| + | | 2 || Add resources worth $1,000 to your ship || $500 || $700 || $1,000 || $1,400 || $1,900 || $5,500 |
||
| − | |3rd. Level |
||
| − | |15% |
||
| − | |$4,000 |
||
|- |
|- |
||
| + | | 3 || Add resources worth $1,500 to your ship || $700 || $900 || $1,200 || $1,600 || $2,100 || $6,500 |
||
| − | |4th. Level |
||
| − | |20% |
||
| − | |$5,000 |
||
|- |
|- |
||
| + | | 4 || Add resources worth $2,000 to your ship || $900 || $1,100 || $1,400 || $1,800 || $2,300 || $7,500 |
||
| − | |5th. Level |
||
| − | |25% |
||
| − | |$6,000 |
||
| − | |- |
||
| − | |6th. Level |
||
| − | |30% |
||
| − | |$12,000 |
||
|} |
|} |
||
| − | == |
+ | === Loot === |
| − | There |
+ | There are 2 loot perks: |
| + | ==== [[File:Perks-CreditBonus.png]] Credit Loot Bonus ==== |
||
| − | === Hull Hitpoints (20 levels) === |
||
| + | Increases the amount of credits found. It has thirteen levels and a total cost of $39,000 credits. |
||
| − | Increases your ship's hull hitpoints. Your starting points are 500. ''(See chart below)'' |
||
| − | |||
| − | == Shield Generator == |
||
| − | There are 3 shield generator perks: |
||
| − | |||
| − | === Shield Capacity (20 levels) === |
||
| − | Increases your [[Shield capacity bonus|shield's capacity]]. |
||
{| class="wikitable" |
{| class="wikitable" |
||
| + | ! Level |
||
| − | !Colonial |
||
| + | ! Percent Increase |
||
| − | Interceptor |
||
| + | ! Cost |
||
| − | !Hull |
||
| − | Hitpoints |
||
| − | !Shield |
||
| − | Capacity |
||
| − | !Cost |
||
|- |
|- |
||
| + | | 1 || 2% || $200 |
||
| − | |1st. Level |
||
| − | |515 |
||
| − | |2.5% |
||
| − | |$200 |
||
|- |
|- |
||
| + | | 2 || 3% || $300 |
||
| − | |2nd. Level |
||
| − | |530 |
||
| − | |5% |
||
| − | |$500 |
||
|- |
|- |
||
| + | | 3 || 5% || $500 |
||
| − | |3rd. Level |
||
| − | |545 |
||
| − | |7.5% |
||
| − | |$800 |
||
|- |
|- |
||
| + | | 4 || 7% || $800 |
||
| − | |4th. Level |
||
| − | |560 |
||
| − | |10% |
||
| − | |$1,200 |
||
|- |
|- |
||
| + | | 5 || 10% || $1,200 |
||
| − | |5th. Level |
||
| − | |575 |
||
| − | |12.5% |
||
| − | |$1,550 |
||
|- |
|- |
||
| + | | 6 || 13% || $1,700 |
||
| − | |6th. Level |
||
| − | |590 |
||
| − | |15% |
||
| − | |$1,700 |
||
|- |
|- |
||
| + | | 7 || 17% || $2,300 |
||
| − | |7th. Level |
||
| − | |605 |
||
| − | |17.5% |
||
| − | |$1,850 |
||
|- |
|- |
||
| + | | 8 || 21% || $3,000 |
||
| − | |8th. Level |
||
| − | |620 |
||
| − | |20% |
||
| − | |$2,000 |
||
|- |
|- |
||
| + | | 9 || 26% || $3,800 |
||
| − | |9th. Level |
||
| − | |635 |
||
| − | |22.5% |
||
| − | |$2,200 |
||
|- |
|- |
||
| + | | 10 || 30% || $4,700 |
||
| − | |10th. Level |
||
| − | |650 |
||
| − | |25% |
||
| − | |$2,400 |
||
|- |
|- |
||
| + | | 11 || 35% || $5,700 |
||
| − | |11th. Level |
||
| − | |665 |
||
| − | |27.5% |
||
| − | |$2,650 |
||
|- |
|- |
||
| + | | 12 || 41% || $6,800 |
||
| − | |12th. Level |
||
| − | |680 |
||
| − | |30% |
||
| − | |$2,900 |
||
|- |
|- |
||
| + | | 13 || 50% || $8,000 |
||
| − | |13th. Level |
||
| − | | |
+ | |} |
| + | |||
| − | |32.5% |
||
| + | ==== [[File:Perks-LootBonus.png]] Rare Loot Chance ==== |
||
| − | |$3,200 |
||
| + | Increases the chance of finding better loot. It has four levels and a total cost of $24,500 credits. |
||
| − | |- |
||
| + | |||
| − | |14th. Level |
||
| + | Requirements: Credit Loot Bonus. |
||
| − | |710 |
||
| + | {| class="wikitable" |
||
| − | |35% |
||
| + | ! Level |
||
| − | |$3,500 |
||
| + | ! Chance |
||
| − | |- |
||
| + | ! Cost |
||
| − | |15th. Level |
||
| − | |725 |
||
| − | |37.5% |
||
| − | |$3,850 |
||
| − | |- |
||
| − | |16th. Level |
||
| − | |740 |
||
| − | |40% |
||
| − | |$4,250 |
||
|- |
|- |
||
| + | | 1 || 2.5% || $2,500 |
||
| − | |17th. Level |
||
| − | |755 |
||
| − | |42.5% |
||
| − | |$4,700 |
||
|- |
|- |
||
| + | | 2 || 5% || $5,000 |
||
| − | |18th. Level |
||
| − | |770 |
||
| − | |45% |
||
| − | | |
||
|- |
|- |
||
| + | | 3 || 7.5% || $7,000 |
||
| − | |19th. Level |
||
| − | |785 |
||
| − | |47.5% |
||
| − | | |
||
|- |
|- |
||
| + | | 4 || 10% || $10,000 |
||
| − | |20th. Level |
||
| − | |800 |
||
| − | |50% |
||
| − | | |
||
|} |
|} |
||
| − | === |
+ | === Damage And Repair === |
| + | There are four damage and repair perks: |
||
| − | Decreases the time the shield stops regenerating after the shield points have been depleted. ''(See chart below)'' |
||
| + | ==== [[File:Perks-NanoEfficient.png]] Nanobot Efficiency ==== |
||
| − | Requirements: Shield Capacity. |
||
| + | Increases the amount of hull hitpoints repaired by one [[Resources#Nanobots|nanobot]]. Without any levels invested, nanobots repair 35 hull hitpoints. It has ten levels and a total cost of $15,200 credits. |
||
| − | === Shield Recharge (10 levels) === |
||
| − | Increases the speed of shield recharge. |
||
| − | |||
| − | Requirements: Shield Capacity. |
||
{| class="wikitable" |
{| class="wikitable" |
||
| + | ! Level |
||
| − | !Colonial |
||
| + | ! Hitpoints Repaired |
||
| − | Interceptor |
||
| + | ! Cost |
||
| − | !Shield |
||
| − | Shutdown |
||
| − | !Shield |
||
| − | Recharge |
||
| − | !Cost |
||
|- |
|- |
||
| + | | 1 || 36 || $500 |
||
| − | |1st. Level |
||
| − | |2% |
||
| − | |2% |
||
| − | |$1,000 |
||
|- |
|- |
||
| + | | 2 || 37 || $600 |
||
| − | |2nd. Level |
||
| − | |4% |
||
| − | |4% |
||
| − | |$1,100 |
||
|- |
|- |
||
| + | | 3 || 38 || $800 |
||
| − | |3rd. Level |
||
| − | |6% |
||
| − | |6% |
||
| − | |$1,250 |
||
|- |
|- |
||
| + | | 4 || 39 || $1,000 |
||
| − | |4th. Level |
||
| − | |8% |
||
| − | |8% |
||
| − | |$1,400 |
||
|- |
|- |
||
| + | | 5 || 40 || $1,200 |
||
| − | |5th. Level |
||
| − | |10% |
||
| − | |10% |
||
| − | |$1,550 |
||
|- |
|- |
||
| + | | 6 || 41 || $1,500 |
||
| − | |6th. Level |
||
| − | |12% |
||
| − | |12% |
||
| − | |$1,700 |
||
|- |
|- |
||
| + | |7 || 42 || $1,800 |
||
| − | |7th. Level |
||
| − | |14% |
||
| − | |14% |
||
| − | |$1,850 |
||
|- |
|- |
||
| + | |8 || 43 || $2,100 |
||
| − | |8th. Level |
||
| − | |16% |
||
| − | |16% |
||
| − | |$2,000 |
||
|- |
|- |
||
| + | |9 || 44 || $2,600 |
||
| − | |9th. Level |
||
| − | |18% |
||
| − | |18% |
||
| − | |$2,200 |
||
|- |
|- |
||
| + | |10 || 45 || $3,100 |
||
| − | |10th. Level |
||
| − | |20% |
||
| − | |20% |
||
| − | |$2,400 |
||
|} |
|} |
||
| + | ==== [[File:Perks-NanoSpeed.png]] Hitpoint Repair Rate ==== |
||
| − | ==Energy Core== |
||
| + | Increases the speed of repairing your hull (after using nanobots). It has twelve levels and a total cost of $39,000 credits. |
||
| − | There are 2 energy core perks: |
||
| − | |||
| − | === Energy Capacity (20 levels) === |
||
| − | Increases the total energy capacity. You start with 100. |
||
{| class="wikitable" |
{| class="wikitable" |
||
| + | ! Level |
||
| − | !Colonial |
||
| + | ! Repair rate |
||
| − | Interceptor |
||
| + | ! Cost |
||
| − | !Energy |
||
| − | Capacity |
||
| − | !Cost |
||
|- |
|- |
||
| + | | 1 || 27/s || $500 |
||
| − | |1st. Level |
||
| − | |105 |
||
| − | |$200 |
||
|- |
|- |
||
| + | | 2 || 30/s || $1,000 |
||
| − | |2nd. Level |
||
| − | |110 |
||
| − | |$500 |
||
|- |
|- |
||
| + | | 3 || 35/s || $1,500 |
||
| − | |3rd. Level |
||
| − | |115 |
||
| − | |$800 |
||
|- |
|- |
||
| + | | 4 || 40/s || $2,000 |
||
| − | |4th. Level |
||
| − | |120 |
||
| − | |$1,200 |
||
|- |
|- |
||
| + | | 5 || 45/s || $2,500 |
||
| − | |5th. Level |
||
| − | |125 |
||
| − | |$1,550 |
||
|- |
|- |
||
| + | | 6 || 50/s || $3,000 |
||
| − | |6th. Level |
||
| − | |130 |
||
| − | |$1,700 |
||
|- |
|- |
||
| + | | 7 || 55/s || $3,500 |
||
| − | |7th. Level |
||
| − | |135 |
||
| − | |$1,850 |
||
|- |
|- |
||
| + | | 8 || 60/s || $4,000 |
||
| − | |8th. Level |
||
| − | |140 |
||
| − | |$2,000 |
||
|- |
|- |
||
| + | | 9 || 65/s || $4,500 |
||
| − | |9th. Level |
||
| − | |145 |
||
| − | |$2,200 |
||
|- |
|- |
||
| + | | 10 || 70/s || $5,000 |
||
| − | |10th. Level |
||
| − | |150 |
||
| − | |$2,400 |
||
|- |
|- |
||
| + | | 11 || 75/s || $5,500 |
||
| − | |11th. Level |
||
| − | |155 |
||
| − | |$2,650 |
||
|- |
|- |
||
| + | | 12 || 80/s || $6,000 |
||
| − | |12th. Level |
||
| − | | |
+ | |} |
| + | |||
| − | |$2,900 |
||
| + | ==== [[File:Perks-CompCost.png]] Component Damage Repair Costs ==== |
||
| + | Decreases the costs of repairing damaged ship [[Components|components]]. It only has two levels, though each level requires buying multiple parts, and has a total cost of $28,000 credits. |
||
| + | {| class="wikitable" |
||
| + | ! rowspan="2" | Level |
||
| + | ! rowspan="2" | Percent Reduction |
||
| + | ! colspan="6" | Cost |
||
|- |
|- |
||
| + | ! Part 1 !! Part 2 !! Part 3 !! Part 4 !! Total |
||
| − | |13th. Level |
||
| − | |165 |
||
| − | |$3,200 |
||
|- |
|- |
||
| + | | 1 || 20% || $1,000 || $2,000 || $3,000 || $4,000 || $10,000 |
||
| − | |14th. Level |
||
| − | |170 |
||
| − | |$3,500 |
||
|- |
|- |
||
| + | | 2 || 40% || $3,000 || $4,000 || $5,000 || $6,000 || $18,000 |
||
| − | |15th. Level |
||
| − | | |
+ | |} |
| + | |||
| − | | |
||
| + | ==== [[File:Perks-CompDamChance.png]] Component Damage Chance ==== |
||
| + | Decreases the probability of ship [[Components|component]] damage. It has six levels and a total cost of $24,000 credits. |
||
| + | {| class="wikitable" |
||
| + | ! Level |
||
| + | ! Percent Chance Reduction |
||
| + | ! Cost |
||
| + | |- |
||
| + | | 1 || 5% || $500 |
||
|- |
|- |
||
| + | | 2 || 10% || $1,000 |
||
| − | |16th. Level |
||
| − | |180 |
||
| − | | |
||
|- |
|- |
||
| + | | 3 || 20% || $2,000 |
||
| − | |17th. Leve |
||
| − | |185 |
||
| − | | |
||
|- |
|- |
||
| + | | 4 || 30% || $4,000 |
||
| − | |18th. Level |
||
| − | |190 |
||
| − | | |
||
|- |
|- |
||
| + | | 5 || 40% || $6,500 |
||
| − | |19th. Level |
||
| − | |195 |
||
| − | | |
||
|- |
|- |
||
| + | | 6 || 50% || $10,000 |
||
| − | |20th. Level |
||
| − | |200 |
||
| − | |$5,000 |
||
|} |
|} |
||
| + | ==== [[File:Perks-LuckyJump.png]] Lucky Jump Chance ==== |
||
| − | === Energy Regeneration (10 levels) === |
||
| + | Increases the chance of surviving a jump with insufficient fuel unscathed. Without this perk, there is a 25% chance of avoiding all damage. It has eight levels and a total cost of $27,000 credits. |
||
| − | Increases the speed of energy regeneration. You start with 5.00/s. |
||
| − | |||
| − | Requirements: Energy Capacity. |
||
{| class="wikitable" |
{| class="wikitable" |
||
| + | ! Level |
||
| − | !Colonial |
||
| + | ! Chance |
||
| − | Interceptor |
||
| + | ! Cost |
||
| − | !Energy |
||
| − | Regeneration |
||
| − | !Cost |
||
|- |
|- |
||
| + | | 1 || 27.5% || $1,000 |
||
| − | |1st. Level |
||
| − | |5.50/s |
||
| − | |$500 |
||
|- |
|- |
||
| + | | 2 || 30% || $1,500 |
||
| − | |2nd. Level |
||
| − | |6.00/s |
||
| − | |$700 |
||
|- |
|- |
||
| + | | 3 || 32,5% || $2,000 |
||
| − | |3rd. Level |
||
| − | |6.50/s |
||
| − | |$900 |
||
|- |
|- |
||
| + | | 4 || 35% || $2,500 |
||
| − | |4th. Level |
||
| − | |7.00/s |
||
| − | |$1,200 |
||
|- |
|- |
||
| + | | 5 || 37.5% || $3,000 |
||
| − | |5th. Level |
||
| − | |7.50/s |
||
| − | |$1,500 |
||
|- |
|- |
||
| + | | 6 || 40% || $3,500 |
||
| − | |6th. Level |
||
| − | |8.00/s |
||
| − | |$1,900 |
||
|- |
|- |
||
| + | |7 || 45% || $5,500 |
||
| − | |7th. Level |
||
| − | |8.50/s |
||
| − | | |
||
|- |
|- |
||
| + | |8 || 60% || $8,000 |
||
| − | |8th. Level |
||
| + | |} |
||
| − | |9.00/s |
||
| + | |||
| − | | |
||
| + | === Reputation === |
||
| + | There are two reputation perks. |
||
| + | |||
| + | ==== [[File:Perks-Trading.png]] Trading ==== |
||
| + | Get more out of traders and service stations. It has five levels, each level requiring buying of multiple parts, and has a total cost of $26,300 credits. |
||
| + | {| class="wikitable" |
||
| + | ! rowspan="2" | Level |
||
| + | ! rowspan="2" | Effects |
||
| + | ! colspan="6" | Cost |
||
|- |
|- |
||
| + | ! Part 1 !! Part 2 !! Part 3 !! Part 4 !! Part 5 !! Total |
||
| − | |9th. Level |
||
| − | |9.50/s |
||
| − | | |
||
|- |
|- |
||
| + | | 1 || Service stations offer two services. || $200 || $400 || $700 || $1,000 || N/A || $2,300 |
||
| − | |10th. Level |
||
| + | |- |
||
| − | |10.00/s |
||
| + | | 2 || Traders and service stations occasionally buy resources. || $300 || $500 || $800 || $1,200 || $1,700 || $4,500 |
||
| − | | |
||
| + | |- |
||
| + | | 3 || Service stations offer three services. || $500 || $700 || $1,000 || $1,400 || $1,900 || $5,500 |
||
| + | |- |
||
| + | | 4 || Increases fuel and repair capacity of service stations. || $700 || $900 || $1,200 || $1,600 || $2,100 || $6,500 |
||
| + | |- |
||
| + | | 5 || Service stations and traders have more offers || $900 || $1,100 || $1,400 || $1,800 || $2,300 || $7,500 |
||
|} |
|} |
||
| + | ==== [[File:Perks-Diplomacy.png]] Diplomacy ==== |
||
| − | ==Devices & Consumables== |
||
| + | Improves your standing with G&B. It has four levels and a total cost of $18,800 credits. |
||
| − | There are 2 devices and consumables perks: |
||
| − | |||
| − | === Device Slots (3 levels) === |
||
| − | The amount of different [[Equipment|devices]] your ship can carry. You start with 2 slots. |
||
{| class="wikitable" |
{| class="wikitable" |
||
| + | ! rowspan="2" |Level |
||
| − | !Colonial |
||
| + | ! rowspan="2" |Effects |
||
| − | Interceptor |
||
| + | ! colspan="6" |Cost |
||
| − | !Device |
||
| + | |- |
||
| − | Slots |
||
| + | ! Part 1 !!Part 2 !! Part 3 !! Part 4 !! Part 5 !! Total |
||
| − | !Cost |
||
| + | |- |
||
| − | Part1 |
||
| + | | 1 || Reduce the chance of G&B units reporting your attacks. || $200 || $400 || $700 || $1,000 || N/A || $2,300 |
||
| − | !Cost |
||
| − | Part2 |
||
| − | !Cost |
||
| − | Part3 |
||
| − | !Cost |
||
| − | Part4 |
||
| − | !Cost |
||
| − | Part5 |
||
|- |
|- |
||
| + | | 2 || Further reduce the chance of G&B units reporting your attacks. || $300 || $500 || $800 || $1,200 || $1,700 || $4,500 |
||
| − | |1st. Level |
||
| − | |3 slots |
||
| − | |$200 |
||
| − | |$400 |
||
| − | |$600 |
||
| − | |$800 |
||
| − | |N/A |
||
|- |
|- |
||
| + | | 3 || G&B fighters will occasionally jump in to aid you in fighting outlaws. || $500 || $700 || $1,000 || $1,400 || $1,900 || $5,500 |
||
| − | |2nd. Level |
||
| − | |4 slots |
||
| − | |$500 |
||
| − | |$800 |
||
| − | |$1,200 |
||
| − | |$1,500 |
||
| − | |$2,000 |
||
|- |
|- |
||
| + | | 4 || G&B fighters will more often jump in to aid you in fighting outlaws. || $700 || $900 || $1,200 || $1,600 || $2,100 || $6,500 |
||
| − | |3rd. Level |
||
| − | |5 slots |
||
| − | |$1,000 |
||
| − | |$1,500 |
||
| − | |$2,000 |
||
| − | |$2,500 |
||
| − | |$3,500 |
||
|} |
|} |
||
| − | === |
+ | === Miscellaneous === |
| + | There are two miscellaneous perks. |
||
| − | The amount of different [[Equipment|consumables]] your ship can carry. |
||
| + | ==== [[File:Perks-Retrieval.png]] Retrieval ==== |
||
| − | Requirements: Device Slots. |
||
| + | Reveals the location of your last clone's [[Wreck|shipwreck]] on the map and lets you salvage it. It has six levels and a total cost of $26,300 credits. |
||
| + | |||
| + | Requirements: Store Credits, Rare Loot Chance, Credit Loot Bonus. |
||
{| class="wikitable" |
{| class="wikitable" |
||
| + | ! rowspan="2" | Level |
||
| − | !Colonial |
||
| + | ! rowspan="2" | Retrieval |
||
| − | Interceptor |
||
| + | ! colspan="6" | Cost |
||
| − | !Consumable |
||
| − | Slots |
||
| − | !Cost |
||
| − | Part1 |
||
| − | !Cost |
||
| − | Part2 |
||
| − | !Cost |
||
| − | Part3 |
||
| − | !Cost |
||
| − | Part4 |
||
|- |
|- |
||
| + | ! Part 1 !! Part 2 !! Part 3 !! Part 4 !! Part 5 !! Total |
||
| − | |1st. Level |
||
| − | |3 slots |
||
| − | |$200 |
||
| − | |$400 |
||
| − | |$600 |
||
| − | |$800 |
||
|- |
|- |
||
| + | | 1 || Reveals the location of your last clone's ship wreck. || $200 || $400 || $700 || $1,000 || N/A || $2,300 |
||
| − | |2nd. Level |
||
| − | |4 slots |
||
| − | |$500 |
||
| − | |$1,500 |
||
| − | | |
||
| − | | |
||
|- |
|- |
||
| + | | 2 || Adds chance to retrieve primary and secondary weapons. || $300 || $500 || $800 || $1,200 || $1,700 || $4,500 |
||
| − | |3rd. Level |
||
| − | |5 slots |
||
| − | | |
||
| − | | |
||
| − | | |
||
| − | | |
||
|- |
|- |
||
| + | | 3 || Adds chance to retrieve fuel. || $500 || $700 || $1,000 || $1,400 || $1,900 || $5,500 |
||
| − | |4th. Level |
||
| + | |- |
||
| − | |6 slots |
||
| + | | 4 || Adds chance to retrieve devices and consumables || $700 || $900 || $1,200 || $1,600 || $2,100 || $6,500 |
||
| − | | |
||
| − | | |
+ | |- |
| + | | 5 || Increases chances of retrieving anything. || $900 || $1,100 || $1,400 || $1,800 || $2,300 || $7,500 |
||
| − | | |
||
| − | | |
+ | |- |
| + | | 6 || Retrieve at least one piece of equipment of each category (primary, secondary, devices, consumables). |
||
| + | || $1,000 |
||
| + | || $1,200 |
||
| + | || $1,500 |
||
| + | || $1,900 |
||
| + | || $2,500 |
||
| + | || $8,100 |
||
|} |
|} |
||
| + | ==== [[File:Perks-BonusEquipment.png]] Bonus Equipment ==== |
||
| − | ==Loot== |
||
| + | Lets you choose additional random equipment before each run. It has six levels and a total cost of $34,400 credits. |
||
| − | There are 2 loot perks: |
||
| + | Requirements: Primary Weapons Slots, Secondary Weapons Slots, Device Slots. |
||
| − | === Credit Loot Bonus (13 levels) === |
||
| − | Increases the amount of credits found. |
||
{| class="wikitable" |
{| class="wikitable" |
||
| + | ! rowspan="2" | Level |
||
| − | !Colonial |
||
| + | ! rowspan="2" | Bonus Equipment |
||
| − | Interceptor |
||
| + | ! colspan="6" | Cost |
||
| − | !Credit Loot |
||
| − | Bonus |
||
| − | !Cost |
||
|- |
|- |
||
| + | ! Part 1 !! Part 2 !! Part 3 !! Part 4 !! Part 5 !! Total |
||
| − | |1st. Level |
||
| − | |2% |
||
| − | |$200 |
||
|- |
|- |
||
| + | | 1 || Lets you choose additional random equipment before each run (two offers). || $200 || $400 || $700 || $1,000 || N/A || $2,300 |
||
| − | |2nd. Level |
||
| − | |3% |
||
| − | |$300 |
||
|- |
|- |
||
| + | | 2 || Increases the quality of the bonus equipment. || $300 || $500 || $800 || $1,200 || $1,700 || $4,500 |
||
| − | |3rd. Level |
||
| − | |5% |
||
| − | |$500 |
||
|- |
|- |
||
| + | | 3 || Adds a second item to each offer. || $500 || $700 || $1,000 || $1,400 || $1,900 || $5,500 |
||
| − | |4th. Level |
||
| − | |7% |
||
| − | |$800 |
||
|- |
|- |
||
| + | | 4 || Increases the quality of the bonus equipment. || $700 || $900 || $1,200 || $1,600 || $2,100 || $6,500 |
||
| − | |5th. Level |
||
| − | |10% |
||
| − | |$1,200 |
||
|- |
|- |
||
| + | | 5 || Adds a third offer. || $900 || $1,100 || $1,400 || $1,800 || $2,300 || $7,500 |
||
| − | |6th. Level |
||
| − | |13% |
||
| − | |$1,700 |
||
|- |
|- |
||
| + | | 6 || Allows one re-roll of equipment offered. || $1,000 || $1,200 || $1,500 || $1,900 || $2,500 || $8,100 |
||
| − | |7th. Level |
||
| − | | |
+ | |} |
| + | |||
| − | |$2,300 |
||
| + | == Ship Perks == |
||
| + | Each [[Player ships|player ship]] has different perks specific to only them. Some perks are the same type across each type of ship, but have different levels and/or costs. Ship Perks are not global like Pilot Perks so they must be purchased on each ship individually. Maxing all perks on any of the three original ships unlocks the Tinkerer [[Achievements| Achievement]]. <br /> |
||
| + | [[File:Icons-Gunship.png|25px]] The [[Colonial Gunship]] has 13 different perks in six different groups. The total cost of all Gunship perks is $276,650 credits.<br /> |
||
| + | [[File:Icons-Interceptor.png|25px]] The [[Colonial Interceptor]] has eleven perks across five different groups. Fully upgrading the Interceptor costs a total of $243,850 credits.<br /> |
||
| + | [[File:Icons-Scout.png|25px]] The [[Colonial Scout]] has 12 different perks in six different groups. The total cost of all perks for the Scout is $215,300 credits.<br /> |
||
| + | [[File:Icons-Sentinel.png|25px]] The [[Colonial Sentinel]] is a ship that is unlocked with the [[Encounters]] expansion. It has 12 perks across 7 different groups. Maxing out all perks for the Sentinel unlocks the Tuned To The Max [[Achievements| achievement]]. The total cost of all Sentinel perks is $242,650 credits. |
||
| + | |||
| + | === Equipment Slots === |
||
| + | There are five equipment perks: |
||
| + | |||
| + | |||
| + | ===== [[File:Perks-Primary.png]] Primary Weapons Slots ===== |
||
| + | The number of different [[Equipment#Primary Weapons|primary weapon]] systems your ship can carry. The Scout and Sentinel are unable to gain more primary slots meaning they max at two and one weapon slots respectively. The Interceptor can be upgraded to a max of three weapons, while the Gunship can be upgraded to carry four. |
||
| + | |||
| + | Requirements: Device Slots. |
||
| + | {| class="wikitable" |
||
| + | ! rowspan="2" | Level |
||
| + | ! rowspan="2" | Slots |
||
| + | ! rowspan="2" | Availability |
||
| + | ! colspan="6" | Cost |
||
|- |
|- |
||
| + | ! Part 1 !! Part 2 !! Part 3 !! Part 4 !! Part 5 !! Total |
||
| − | |8th. Level |
||
| − | |21% |
||
| − | |$3,000 |
||
|- |
|- |
||
| + | | 1 || Three || [[File:Icons-Gunship.png|link=Colonial Gunship]] [[File:Icons-Interceptor.png|link=Colonial Interceptor]] || $200 || $400 || $600 || $800 || N/A || $2,000 |
||
| − | |9th. Level |
||
| − | |26% |
||
| − | |$3,800 |
||
|- |
|- |
||
| + | | 2 || Four || [[File:Icons-Gunship.png|link=Colonial Gunship]] || $500 || $800 || $1,200 || $1,500 || $2,000 || $6,000 |
||
| − | |10th. Level |
||
| − | | |
+ | |} |
| + | |||
| − | |$4,700 |
||
| + | ===== [[File:Perks-Secondary.png]] Secondary Weapon Slots ===== |
||
| + | The number of different [[Equipment#Secondary Weapons|secondary weapons]] systems your ship can carry. The Gunship begins with two slots, while the Interceptor, Scout, and Sentinel all begin with one. |
||
| + | |||
| + | Requirements: Primary Weapons Slots ([[File:Icons-Gunship.png|25px|link=Colonial Gunship]], [[File:Icons-Interceptor.png|25px|link=Colonial Interceptor]]), Device Slots. |
||
| + | {| class="wikitable" |
||
| + | ! rowspan="2" | Level |
||
| + | ! rowspan="2" | Extra Slots |
||
| + | ! rowspan="2" | Availability |
||
| + | ! colspan="6" | Cost |
||
|- |
|- |
||
| + | ! Part 1 !! Part 2 !! Part 3 !! Part 4 !! Part 5 !! Total |
||
| − | |11th. Level |
||
| − | |35% |
||
| − | |$5,700 |
||
|- |
|- |
||
| + | | 1 || One || [[File:Icons-Gunship.png|link=Colonial Gunship]] [[File:Icons-Interceptor.png|link=Colonial Interceptor]] [[File:Icons-Scout.png|link=Colonial Scout]] [[File:Icons-Sentinel.png|link=Colonial Sentinel]] || $200 || $400 || $600 || $800 || N/A || $2,000 |
||
| − | |12th. Level |
||
| − | |41% |
||
| − | |$6,800 |
||
|- |
|- |
||
| + | | 2 || Two || [[File:Icons-Gunship.png|link=Colonial Gunship]] [[File:Icons-Interceptor.png|link=Colonial Interceptor]] || $500 || $800 || $1,200 || $1,500 || $2,000 || $6,000 |
||
| − | |13th. Level |
||
| − | | |
+ | |- |
| + | | 3 || Three || [[File:Icons-Gunship.png|link=Colonial Gunship]] || $1,000 || $1,500 || $2,000 || $2,500 || $3,500 || $10,500 |
||
| − | |$8,000 |
||
|} |
|} |
||
| + | ===== [[File:Perks-Devices.png]] Device Slots ===== |
||
| − | === Rare Loot Chance (4 levels) === |
||
| + | The number of different [[Equipment#Devices|devices]] your ship can carry. The Gunship and Interceptor begin with two slots, The Scout and Sentinel begin with three. |
||
| − | Increases the chance of finding better loot. |
||
| − | Requirements: Credit Loot Bonus. |
||
{| class="wikitable" |
{| class="wikitable" |
||
| + | ! rowspan="2" | Level |
||
| − | !Colonial |
||
| + | ! rowspan="2" | Extra Slots |
||
| − | Interceptor |
||
| + | ! rowspan="2" | Availability |
||
| − | !Rare Loot |
||
| + | ! colspan="6" | Cost |
||
| − | Chance |
||
| − | !Cost |
||
|- |
|- |
||
| + | ! Part 1 !! Part 2 !! Part 3 !! Part 4 !! Part 5 !! Total |
||
| − | |1st. Level |
||
| − | |2.5% |
||
| − | |$2,500 |
||
|- |
|- |
||
| + | | 1 || One || [[File:Icons-Gunship.png|link=Colonial Gunship]] [[File:Icons-Interceptor.png|link=Colonial Interceptor]] [[File:Icons-Scout.png|link=Colonial Scout]] [[File:Icons-Sentinel.png|link=Colonial Sentinel]] || $200 || $400 || $600 || $800 || N/A || $2,000 |
||
| − | |2nd. Level |
||
| − | |5% |
||
| − | |$5,000 |
||
|- |
|- |
||
| + | | 2 || Two || [[File:Icons-Gunship.png|link=Colonial Gunship]] [[File:Icons-Interceptor.png|link=Colonial Interceptor]] [[File:Icons-Sentinel.png|link=Colonial Sentinel]]|| $500 || $800 || $1,200 || $1,500 || $2,000 || $6,000 |
||
| − | |3rd. Level |
||
| − | |7.5% |
||
| − | |$7,000 |
||
|- |
|- |
||
| + | | 3 || Three || [[File:Icons-Interceptor.png|link=Colonial Interceptor]] [[File:Icons-Sentinel.png|link=Colonial Sentinel]]|| $1,000 || $1,500 || $2,000 || $2,500 || $3,500 || $10,500 |
||
| − | |4th. Level |
||
| − | |10% |
||
| − | |$10,000 |
||
|} |
|} |
||
| + | ===== [[File:Perks-Consumables.png]] Consumable Slots ===== |
||
| − | == Resources == |
||
| + | The number of different [[Equipment#Consumables|consumables]] your ship can carry. The Gunship begins with three, the Interceptor, Scout, and Sentinel begin with two. |
||
| − | There are 3 resources perks: |
||
| + | Requirements: Device Slots. |
||
| − | === Crafting Costs (4 levels) === |
||
| − | Decreases the amount of resources needed for crafting. ''(See table below).'' |
||
| − | |||
| − | Requirements: Consumable Slots, Device Slots. |
||
| − | === Mining Yield (4 levels) === |
||
| − | Increases the amount of resources gained from mining. |
||
| − | |||
| − | Requirements: Crafting Costs, Consumable Slots, Device Slots. |
||
{| class="wikitable" |
{| class="wikitable" |
||
| + | ! rowspan="2" | Level |
||
| − | !Colonial |
||
| + | ! rowspan="2" | Extra Slots |
||
| − | Interceptor |
||
| + | ! rowspan="2" | Availability |
||
| − | !Crafting |
||
| + | ! colspan="6" | Cost |
||
| − | Costs |
||
| − | !Mining |
||
| − | Yield |
||
| − | !Cost |
||
|- |
|- |
||
| + | ! Part 1 !! Part 2 !! Part 3 !! Part 4 !! Part 5 !! Total |
||
| − | |1st. Level |
||
| − | |10% |
||
| − | |10% |
||
| − | |$4,000 |
||
|- |
|- |
||
| + | | 1 || One || [[File:Icons-Gunship.png|link=Colonial Gunship]] [[File:Icons-Interceptor.png|link=Colonial Interceptor]] [[File:Icons-Scout.png|link=Colonial Scout]] [[File:Icons-Sentinel.png|link=Colonial Sentinel]] || $200 || $400 || $600 || $800 || N/A || $2,000 |
||
| − | |2nd. Level |
||
| − | |15% |
||
| − | |15% |
||
| − | |$6,000 |
||
|- |
|- |
||
| + | | 2 || Two || [[File:Icons-Gunship.png|link=Colonial Gunship]] [[File:Icons-Interceptor.png|link=Colonial Interceptor]] [[File:Icons-Scout.png|link=Colonial Scout]] [[File:Icons-Sentinel.png|link=Colonial Sentinel]] || $500 || $800 || $1,200 || $1,500 || $2,000 || $6,000 |
||
| − | |3rd. Level |
||
| − | |20% |
||
| − | |20% |
||
| − | |$8,000 |
||
|- |
|- |
||
| + | | 3 || Three || [[File:Icons-Gunship.png|link=Colonial Gunship]] [[File:Icons-Interceptor.png|link=Colonial Interceptor]] [[File:Icons-Scout.png|link=Colonial Scout]] || $1,000 || $1,500 || $2,000 || $2,500 || $3,500 || $10,500 |
||
| − | |4th. Level |
||
| − | |25% |
||
| − | |25% |
||
| − | |$10,000 |
||
|} |
|} |
||
| + | ===== [[File:Perks-Enhancements.png]] Enhancement Slots ===== |
||
| − | === Bonus Resources (4 levels) === |
||
| + | The amount of different [[Subroutines]] or [[Glyphs]] your ship can carry. All ships begin with one slot and can gain two more at a total cost of $24,000 credits. |
||
| − | Lets you start a run with additional random resources on board. |
||
| − | Requirements: |
+ | Requirements: Device Slots, Consumable Slots. |
{| class="wikitable" |
{| class="wikitable" |
||
| + | ! Level |
||
| − | !Colonial |
||
| + | ! Slots |
||
| − | Interceptor |
||
| − | !Bonus Resources |
||
| − | !Cost |
||
| − | Part1 |
||
!Cost |
!Cost |
||
| − | Part2 |
||
| − | !Cost |
||
| − | Part3 |
||
| − | !Cost |
||
| − | Part4 |
||
| − | !Cost |
||
| − | Part5 |
||
|- |
|- |
||
| + | | 1 || Two || $8,000 |
||
| − | |1st. Level |
||
| − | |Add resources worth $500 to your ship |
||
| − | |$200 |
||
| − | |$400 |
||
| − | |$600 |
||
| − | |$800 |
||
| − | |N/A |
||
|- |
|- |
||
| + | | 2 || Three || $16,000 |
||
| − | |2nd. Level |
||
| + | |} |
||
| − | |Add resources worth $1,000 to your ship |
||
| + | |||
| − | |$500 |
||
| + | === Sensors === |
||
| − | |$700 |
||
| + | There is a single Sensors perk, which is unique to the Scout. [[File:Icons-Scout.png|50px]] |
||
| − | |$1,000 |
||
| + | |||
| − | |$1,400 |
||
| + | ===== [[File:Perks-Sensors.png]] Sensor Range ===== |
||
| − | |$1,900 |
||
| + | Increases your sensor's range. |
||
| + | |||
| + | Requirements: Hull Hitpoints. |
||
| + | {| class="wikitable" |
||
| + | ! Level !! Range Increase !! Cost !! Visual Upgrade |
||
|- |
|- |
||
| + | | 1 || 5% || $1,000 || |
||
| − | |3rd. Level |
||
| − | |Add resources worth $1,500 to your ship |
||
| − | |$700 |
||
| − | |$900 |
||
| − | |$1,200 |
||
| − | |$1,600 |
||
| − | |$2,100 |
||
|- |
|- |
||
| + | | 2 || 10% || $1,500 || ✓ |
||
| − | |4th. Level |
||
| + | |- |
||
| − | |Add resources worth $2,000 to your ship |
||
| + | | 3 || 15% || $2,200 || |
||
| − | |$900 |
||
| + | |- |
||
| − | |$1,100 |
||
| + | | 4 || 20% || $3,500 || ✓ |
||
| − | |$1,400 |
||
| − | |$1,800 |
||
| − | |$2,300 |
||
|} |
|} |
||
| − | == |
+ | === Hull === |
| − | There are |
+ | There are two Hull perks: |
| + | ===== [[File:PerksHull.png]] Hull Hitpoints ===== |
||
| − | === Nanobot Efficiency (15 levels) === |
||
| − | Increases |
+ | Increases your ship's hull hitpoints. The Gunship begins with 1,090 Hitpoints, The Interceptor with 450, and the Sentinel with 300. The Scout's Hull cannot be upgraded. |
| − | Requirements: Hull Hitpoints. |
||
{| class="wikitable" |
{| class="wikitable" |
||
| + | ! Level !! [[File:Icons-Gunship.png|link=Colonial Gunship]] !! [[File:Icons-Interceptor.png|link=Colonial Interceptor]] !! [[File:Icons-Sentinel.png|link=Colonial Sentinel]] !! Cost |
||
| − | !Colonial |
||
| − | Interceptor |
||
| − | !Nanobot |
||
| − | Efficiency |
||
| − | !Cost |
||
|- |
|- |
||
| + | | 1 || 1,105 || 465 || 310 || $200 |
||
| − | |1st. Level |
||
| − | |36.00 |
||
| − | |$500 |
||
|- |
|- |
||
| + | | 2 || 1,120 || 480 || 330 || $500 |
||
| − | |2nd. Level |
||
| − | |37.00 |
||
| − | |$600 |
||
|- |
|- |
||
| + | | 3 || 1,135 || 495 || 345 || $800 |
||
| − | |3rd. Level |
||
| − | |38.00 |
||
| − | |$800 |
||
|- |
|- |
||
| + | | 4 || 1,150 || 510 || 360 || $1,200 |
||
| − | |4th. Level |
||
| − | |39.00 |
||
| − | |$1,000 |
||
|- |
|- |
||
| + | | 5 || 1,165 || 525 || 375 || $1,550 |
||
| − | |5th. Level |
||
| − | |40.00 |
||
| − | |$1,250 |
||
|- |
|- |
||
| + | | 6 || 1,180 || 540 || 390 || $1,700 |
||
| − | |6th. Level |
||
| − | |41.00 |
||
| − | |$1,500 |
||
|- |
|- |
||
| + | | 7 || 1,195 || 555 || 405 || $1,850 |
||
| − | |7th. Level |
||
| − | |42.00 |
||
| − | |$1,800 |
||
|- |
|- |
||
| + | | 8 || 1,210 || 570 || 420 || $2,000 |
||
| − | |8th. Level |
||
| − | |43.00 |
||
| − | | |
||
|- |
|- |
||
| + | | 9 || 1,225 || 585 || 435 || $2,200 |
||
| − | |9th. Level |
||
| − | |44.00 |
||
| − | | |
||
|- |
|- |
||
| + | | 10 || 1,240 || 600 || 450 || $2,400 |
||
| − | |10th. Level |
||
| − | |45.00 |
||
| − | | |
||
|- |
|- |
||
| + | | 11 || 1,255 || 615 || N/A || $2,650 |
||
| − | |11th. Level |
||
| − | |46.00 |
||
| − | | |
||
|- |
|- |
||
| + | | 12 || 1,270 || 630 || N/A || $2,900 |
||
| − | |12th. Level |
||
| − | |47.00 |
||
| − | | |
||
|- |
|- |
||
| + | | 13 || 1,285 || 645 || N/A || $3,200 |
||
| − | |13th. Level |
||
| − | |48.00 |
||
| − | | |
||
|- |
|- |
||
| + | | 14 || 1,300 || 660 || N/A || $3,500 |
||
| − | |14th. Level |
||
| − | |49.00 |
||
| − | | |
||
|- |
|- |
||
| + | | Total || $26,650 || $26,650 || $14,400 || |
||
| − | |15th. Level |
||
| − | |50.00 |
||
| − | | |
||
|} |
|} |
||
| + | ===== [[File:Perks-Armor.png]] Armor ===== |
||
| − | === Hitpoint Repair Rate (12 levels) === |
||
| + | Reduces all damage dealt to your hull by a specific percentage. Unique to the Gunship, it has 10 levels and you start with 35% damage reduction. [[File:Icons-Gunship.png|50px]] |
||
| − | Increases the speed of repairing your hull. |
||
| − | Requirements: Hull Hitpoints, Nanobot Efficiency. |
||
{| class="wikitable" |
{| class="wikitable" |
||
| + | ! Level !! Damage Reduction !! Cost |
||
| − | !Colonial |
||
| − | Interceptor |
||
| − | !Hitpoint |
||
| − | Repair Rate |
||
| − | !Cost |
||
|- |
|- |
||
| + | | 1 || 36% || $500 |
||
| − | |1st. Level |
||
| − | |27.00/s |
||
| − | |$500 |
||
|- |
|- |
||
| + | | 2 || 37% || $1,000 |
||
| − | |2nd. Level |
||
| − | |30.00/s |
||
| − | |$1,000 |
||
|- |
|- |
||
| + | | 3 || 38% || $2,000 |
||
| − | |3rd. Level |
||
| − | |35.00/s |
||
| − | |$1,500 |
||
|- |
|- |
||
| + | | 4 || 39% || $3,000 |
||
| − | |4th. Level |
||
| − | |40.00/s |
||
| − | |$2,000 |
||
|- |
|- |
||
| + | | 5 || 40% || $4,000 |
||
| − | |5th. Level |
||
| + | |} |
||
| − | |45.00/s |
||
| + | |||
| − | |$2.500 |
||
| + | === Energy Core === |
||
| + | There are two Energy Core perks: |
||
| + | |||
| + | ===== [[File:Perks-Energy.png]] Energy Capacity ===== |
||
| + | Increases the total energy capacity. The Gunship starts with 140, the Interceptor with 100, the Scout with 75, and the Sentinel with 135. All Ships recieve visual upgrades at levels 5 and 10. |
||
| + | |||
| + | {| class="wikitable" |
||
| + | ! Level !! [[File:Icons-Gunship.png|link=Colonial Gunship]] !! [[File:Icons-Interceptor.png|link=Colonial Interceptor]] !! [[File:Icons-Scout.png|link=Colonial Scout]] !! [[File:Icons-Sentinel.png|link=Colonial Sentinel]] !! Cost |
||
|- |
|- |
||
| + | | 1 || 145 || 105 || 80 || 142 || $200 |
||
| − | |6th. Level |
||
| − | |50.00/s |
||
| − | |$3,000 |
||
|- |
|- |
||
| + | | 2 || 150 || 110 || 85 || 150 || $500 |
||
| − | |7th. Level |
||
| − | | |
||
| − | | |
||
|- |
|- |
||
| + | | 3 || 155 || 115 || 90 || 157 || $800 |
||
| − | |8th. Level |
||
| − | | |
||
| − | | |
||
|- |
|- |
||
| + | | 4 || 160 || 120 || 95 || 165 || $1,200 |
||
| − | |9th. Level |
||
| − | | |
||
| − | | |
||
|- |
|- |
||
| + | | 5 || 165 || 125 || 100 || 172 || $1,550 |
||
| − | |10th. Level |
||
| − | | |
||
| − | | |
||
|- |
|- |
||
| + | | 6 || 170 || 130 || 105 || 180 || $1,700 |
||
| − | |11th. Level |
||
| − | | |
||
| − | | |
||
|- |
|- |
||
| + | | 7 || 175 || 135 || 110 || 187 || $1,850 |
||
| − | |12th. Level |
||
| − | | |
||
| − | | |
||
| − | |} |
||
| − | |||
| − | === Component Damage Repair Costs (2 levels) === |
||
| − | Decreases the costs of repairing damaged ship components. |
||
| − | |||
| − | Requirements: Hull Hitpoints, Nanobot Efficiency, Component Damage Chance. |
||
| − | {| class="wikitable" |
||
| − | !Colonial |
||
| − | Interceptor |
||
| − | !Component Damage |
||
| − | Repair Costs |
||
| − | !Cost |
||
| − | Part1 |
||
| − | !Cost |
||
| − | Part2 |
||
| − | !Cost |
||
| − | Part3 |
||
| − | !Cost |
||
| − | Part4 |
||
|- |
|- |
||
| + | | 8 || 180 || 140 || 115 || 195 || $2,000 |
||
| − | |1st. Level |
||
| − | |20% |
||
| − | |$1,000 |
||
| − | |$2,000 |
||
| − | | |
||
| − | | |
||
|- |
|- |
||
| + | | 9 || 185 || 145 || 120 || 202 || $2,200 |
||
| − | |2nd. Level |
||
| − | | |
||
| − | | |
||
| − | | |
||
| − | | |
||
| − | | |
||
| − | |} |
||
| − | |||
| − | === Component Damage Chance (6 levels) === |
||
| − | Decreases the probability of ship component damage. |
||
| − | |||
| − | Requirements: Hull Hitpoints, Nanobot Efficiency. |
||
| − | {| class="wikitable" |
||
| − | !Colonial |
||
| − | Interceptor |
||
| − | !Component |
||
| − | Damage Chance |
||
| − | !Cost |
||
|- |
|- |
||
| + | | 10 || 190 || 150 || 125 || 210 || $2,400 |
||
| − | |1st. Level |
||
| − | |5% |
||
| − | |$500 |
||
|- |
|- |
||
| + | | 11 || 195 || 155 || 130 || 217 || $2,650 |
||
| − | |2nd. Level |
||
| − | |10% |
||
| − | |$1,000 |
||
|- |
|- |
||
| + | | 12 || 200 || 160 || 140 || 225 || $2,900 |
||
| − | |3rd. Level |
||
| − | |20% |
||
| − | |$2,000 |
||
|- |
|- |
||
| + | | 13 || 205 || 165 || 145 || 232 || $3,200 |
||
| − | |4th. Level |
||
| − | |30% |
||
| − | |$4,000 |
||
|- |
|- |
||
| + | | 14 || 210 || 170 || 150 || 240 || $3,500 |
||
| − | |5th. Level |
||
| − | |40% |
||
| − | |$6,500 |
||
|- |
|- |
||
| + | | 15 || 215 || 175 || N/A || 247 || $3,850 |
||
| − | |6th. Level |
||
| − | | |
+ | |- |
| + | | 16 || 220 || 180 || N/A || 255 || $4,250 |
||
| − | | |
||
| + | |- |
||
| + | | 17 || 225 || 185 || N/A || N/A || $4,700 |
||
| + | |- |
||
| + | | 18 || 230 || 190 || N/A || N/A || $5,200 |
||
| + | |- |
||
| + | | 19 || 235 || 195 || N/A || N/A || $5,750 |
||
| + | |- |
||
| + | | 20 || 240 || 200 || N/A || N/A || $6,300 |
||
| + | |- |
||
| + | | Total || $56,700 || $56,700 || $30,500 || $38,600 || |
||
|} |
|} |
||
| + | ===== [[File:Perks-EnergyRegen.png]] Energy Regeneration ===== |
||
| − | ==Jump Drive== |
||
| + | Increases the speed of energy regeneration. The interceptor begins with a regen rate of 5.00/s, while all the others start at 6.00/s |
||
| − | There are 3 jump drive perks: |
||
| − | |||
| − | === Fuel Capacity (2 levels) === |
||
| − | Extends your fuel tank, increasing the maximum number of jumps. You start with 4 jumps. |
||
Requirements: Energy Capacity. |
Requirements: Energy Capacity. |
||
{| class="wikitable" |
{| class="wikitable" |
||
| + | ! Level !! [[File:Icons-Gunship.png|link=Colonial Gunship]] !! [[File:Icons-Interceptor.png|link=Colonial Interceptor]] !! [[File:Icons-Scout.png|link=Colonial Scout]] !! [[File:Icons-Sentinel.png|link=Colonial Sentinel]] !! Cost |
||
| − | !Colonial |
||
| + | |- |
||
| − | Interceptor |
||
| + | | 1 || 6.5/s || 5.5/s || 6.5/s || 6.5/s || $500 |
||
| − | !Fuel |
||
| + | |- |
||
| − | Capacity |
||
| + | | 2 || 7.0/s || 6.0/s || 7.0/s || 7.0/s || $700 |
||
| − | !Cost |
||
| + | |- |
||
| − | Part1 |
||
| + | | 3 || 7.5/s || 6.5/s || 7.5/s || 7.5/s || $900 |
||
| − | !Cost |
||
| + | |- |
||
| − | Part2 |
||
| + | | 4 || 8.0/s || 7.0/s || 8.0/s || 8.0/s || $1,200 |
||
| − | !Cost |
||
| + | |- |
||
| − | Part3 |
||
| + | | 5 || 8.5/s || 7.5/s || 8.5/s || 8.5/s || $1,500 |
||
| − | !Cost |
||
| + | |- |
||
| − | Part4 |
||
| + | | 6 || 9.0/s || 8.0/s || 9.0/s || 9.0/s || $1,900 |
||
| + | |- |
||
| + | | 7 || 9.5/s || 8.5/s || 9.5/s || 9.5/s || $2,400 |
||
| + | |- |
||
| + | | 8 || N/A || 9.0/s || 10.0/s || 10.0/s || $3,000 |
||
| + | |- |
||
| + | | 9 || N/A || 9.5/s || 10.5/s || 10.5/s || $4,000 |
||
| + | |- |
||
| + | | 10 || N/A || N/A || 11.0/s || 11.0/s || $5,000 |
||
| + | |- |
||
| + | | 11 || N/A || N/A || 12.0/s || 12.0/s || $5,500 |
||
| + | |- |
||
| + | | 12 || N/A || N/A || N/A || 12.5/s || $6,000 |
||
|- |
|- |
||
| + | | 13 || N/A || N/A || N/A || 13.0/s || $6,500 |
||
| − | |1st. Level |
||
| − | |5 jumps |
||
| − | |$1,000 |
||
| − | |$2,000 |
||
| − | |$3,000 |
||
| − | |$4,000 |
||
|- |
|- |
||
| + | | Total || $9,100 || $16,100 || $26,600 || $39,100 || |
||
| − | |2nd. Level |
||
| − | |6 jumps |
||
| − | | |
||
| − | | |
||
| − | | |
||
| − | | |
||
|} |
|} |
||
| − | === |
+ | === Engine === |
| + | There are two Engine perks: |
||
| − | Increases the chance of surviving a jump with insufficient fuel unscathed. |
||
| + | ===== [[File:Perks-VMax.png]] Max Speed ===== |
||
| − | Requirements: Energy Capacity. |
||
| + | Increases the maximum speed of your ship. The Gunship starts with a speed of 110m/s, the Interceptor at 120m/s, the Scout at 130m/s, and the sentinel at 120m/s. All ships recieve visual upgrades at levels three and seven and the Interceptor recieves further upgrades at every level after the first. |
||
| + | |||
| + | Requirements: Hull Hitpoints. |
||
{| class="wikitable" |
{| class="wikitable" |
||
| + | ! Level !! [[File:Icons-Gunship.png|link=Colonial Gunship]] !! [[File:Icons-Interceptor.png|link=Colonial Interceptor]] !! [[File:Icons-Scout.png|link=Colonial Scout]] !! [[File:Icons-Sentinel.png|link=Colonial Sentinel]] !! Cost |
||
| − | !Colonial |
||
| − | Interceptor |
||
| − | !Lucky Jump |
||
| − | Chance |
||
| − | !Cost |
||
|- |
|- |
||
| + | | 1 || 113m/s || 123m/s || 133m/s || 123m/s || $700 |
||
| − | |1st. Level |
||
| − | |27.5% |
||
| − | |$1,000 |
||
|- |
|- |
||
| + | | 2 || 116m/s || 126m/s || 136m/s || 126m/s || $1,200 |
||
| − | |2nd. Level |
||
| − | |30% |
||
| − | |$1,500 |
||
|- |
|- |
||
| + | | 3 || 119m/s || 129m/s || 139m/s || 129m/s || $2,000 |
||
| − | |3rd. Level |
||
| − | | |
||
| − | |$2,000 |
||
|- |
|- |
||
| + | | 4 || 122m/s || 132m/s || 142m/s || 132m/s || $3,000 |
||
| − | |4th. Level |
||
| − | | |
||
| − | |$2,500 |
||
|- |
|- |
||
| + | | 5 || 125m/s || 135m/s || 145m/s || 135m/s || $5,000 |
||
| − | |5th. Level |
||
| − | | |
||
| − | |$3,000 |
||
|- |
|- |
||
| + | | 6 || 128m/s || 138m/s || 148m/s || 138m/s || $7,000 |
||
| − | |6th. Level |
||
| − | | |
||
| − | |$3,500 |
||
|- |
|- |
||
| + | | 7 || 130m/s || 140m/s || 150m/s || 140m/s || $9,000 |
||
| − | |7th. Level |
||
| − | | |
||
| − | |$4,000 |
||
|- |
|- |
||
| + | | Total || $27,900 || $27,900 || $27,900 || $27,900 || |
||
| − | |8th. Level |
||
| − | | |
||
| − | |$4,500 |
||
|} |
|} |
||
| + | ===== [[File:Perks-BoostSpeed.png]] Boost Speed ===== |
||
| − | === Jump Charge Time (6 levels) === |
||
| + | Increases the speed of your ship while boosting. All ships receive visual upgrades at their second and last available levels. |
||
| − | Decreases the time your jump drive needs to charge before triggering the jump. You start with 6s. |
||
| − | Requirements: |
+ | Requirements: Max Speed, Hull Hitpoints. |
{| class="wikitable" |
{| class="wikitable" |
||
| + | ! Level !! [[File:Icons-Gunship.png|link=Colonial Gunship]] !! [[File:Icons-Interceptor.png|link=Colonial Interceptor]] !! [[File:Icons-Scout.png|link=Colonial Scout]] !! [[File:Icons-Sentinel.png|link=Colonial Sentinel]] !! Cost |
||
| − | !Colonial |
||
| − | Interceptor |
||
| − | !Jump Charge |
||
| − | Time |
||
| − | !Cost |
||
| − | Part1 |
||
| − | !Cost |
||
| − | Part2 |
||
| − | !Cost |
||
| − | Part3 |
||
| − | !Cost |
||
| − | Part4 |
||
| − | !Cost |
||
| − | Part5 |
||
|- |
|- |
||
| + | | 1 || 2.45x || 2.6x || 3.1x || 2.5x || $2,000 |
||
| − | |1st. Level |
||
| − | |5.5s |
||
| − | |$1,000 |
||
| − | |$1,100 |
||
| − | |$1,200 |
||
| − | |$1,300 |
||
| − | |N/A |
||
|- |
|- |
||
| + | | 2 || 2.55x || 2.7x || 3.2x || 2.6x || $3,500 |
||
| − | |2nd. Level |
||
| − | |5s |
||
| − | |$1,100 |
||
| − | |$1,200 |
||
| − | |$1,300 |
||
| − | |$1,400 |
||
| − | |$1,500 |
||
|- |
|- |
||
| + | | 3 || 2.65x || 2.8x || 3.3x || 2.7x || $5,000 |
||
| − | |3rd. Level |
||
| − | |4.5s |
||
| − | | |
||
| − | | |
||
| − | | |
||
| − | | |
||
| − | | |
||
|- |
|- |
||
| + | | 4 || N/A || 2.9x || 3.4x || 2.8x || $7,000 |
||
| − | |4th. Level |
||
| − | |4s |
||
| − | | |
||
| − | | |
||
| − | | |
||
| − | | |
||
| − | | |
||
|- |
|- |
||
| + | | 5 || N/A || N/A || 3.5x || N/A || $10,000 |
||
| − | |5th. Level |
||
| − | |3.5s |
||
| − | | |
||
| − | | |
||
| − | | |
||
| − | | |
||
| − | | |
||
|- |
|- |
||
| + | | Total || $10,500 || $17,500 || $27,500 || $17,500 || |
||
| − | |6th. Level |
||
| − | |3s |
||
| − | | |
||
| − | | |
||
| − | | |
||
| − | | |
||
| − | | |
||
|} |
|} |
||
| − | == |
+ | === Jump Drive === |
| − | There are |
+ | There are two Jump Drive perks: |
| − | === |
+ | ===== [[File:Perks-Fuel.png]] Fuel Capacity ===== |
| + | Extends your [[Resources#Fuel|fuel]] tank, increasing the maximum number of jumps. All ships start with four jumps and a tank holding 100 fuel. |
||
| − | Reveals the location of your last clone's ship wreck on the map and lets you salvage it. |
||
| − | Requirements: |
+ | Requirements: Energy Capacity. |
{| class="wikitable" |
{| class="wikitable" |
||
| + | ! rowspan="2" | Level |
||
| − | !Colonial |
||
| + | ! rowspan="2" | Jumps |
||
| − | Interceptor |
||
| + | ! rowspan="2" | Availability |
||
| − | !Retrieval |
||
| − | !Cost |
+ | ! colspan="6" | Cost |
| − | Part1 |
||
| − | !Cost |
||
| − | Part2 |
||
| − | !Cost |
||
| − | Part3 |
||
| − | !Cost |
||
| − | Part4 |
||
| − | !Cost |
||
| − | Part5 |
||
|- |
|- |
||
| + | ! Part 1 !! Part 2 !! Part 3 !! Part 4 !! Total |
||
| − | |1st. Level |
||
| − | |Reveals the location of your |
||
| − | last clone's ship wreck |
||
| − | |$200 |
||
| − | |$400 |
||
| − | |$700 |
||
| − | |$1,000 |
||
| − | |N/A |
||
|- |
|- |
||
| + | | 1 || Five || [[File:Icons-Gunship.png|link=Colonial Gunship]] [[File:Icons-Interceptor.png|link=Colonial Interceptor]] [[File:Icons-Scout.png|link=Colonial Scout]] [[File:Icons-Sentinel.png|link=Colonial Sentinel]] || $1,000 || $2,000 || $3,000 || $4,000 || $10,000 |
||
| − | |2nd. Level |
||
| − | |Adds chance to retrieve |
||
| − | primary and secondary weapons |
||
| − | |$300 |
||
| − | |$500 |
||
| − | |$800 |
||
| − | |$1,200 |
||
| − | |$1,700 |
||
|- |
|- |
||
| + | | 2 || Six || [[File:Icons-Gunship.png|link=Colonial Gunship]] [[File:Icons-Interceptor.png|link=Colonial Interceptor]] [[File:Icons-Sentinel.png|link=Colonial Sentinel]] || $3,000 || $4,000 || $5,000 || $6,000 || $18,000 |
||
| − | |3rd. Level |
||
| + | |} |
||
| − | |Adds chance to retrieve fuel |
||
| − | |$500 |
||
| − | |$700 |
||
| − | |$1,000 |
||
| − | |$1,400 |
||
| − | |$1,900 |
||
| − | |- |
||
| − | |4th. Level |
||
| − | |Adds chance to retrieve |
||
| + | ===== [[File:Perks-JumpSpeed.png]] Jump Charge Time ===== |
||
| − | devices and consumables |
||
| + | Decreases the time your jump drive needs to charge before triggering the jump. It starts with a six second jump time. This upgrade is unique to the Scout. [[File:Icons-Scout.png|50px]] |
||
| − | |$700 |
||
| + | {| class="wikitable" |
||
| − | |$900 |
||
| + | ! rowspan="2" | Level |
||
| − | |$1,200 |
||
| + | ! rowspan="2" | Time |
||
| − | |$1,600 |
||
| + | ! colspan="6" | Cost |
||
| − | |$2,100 |
||
| + | |- |
||
| + | ! Part 1 !! Part 2 !! Part 3 !! Part 4 !! Part 5 !! Total |
||
|- |
|- |
||
| + | | 1 || 5.5s || $200 || $400 || $700 || $1,000 || N/A || $2,300 |
||
| − | |5th. Level |
||
| − | |Increases chances of retrieving anything |
||
| − | |$900 |
||
| − | |$1,100 |
||
| − | |$1,400 |
||
| − | |$1,800 |
||
| − | | |
||
|- |
|- |
||
| + | |2 || 5.0s || $500 || $700 || $1,000 || $1,400 || $1,900 || $5,500 |
||
| − | |6th. Level |
||
| − | | |
+ | |- |
| + | |3 || 4.5s || $700 || $900 || $1,200 || $1,600 || $2,100 || $6,500 |
||
| − | | |
||
| − | | |
+ | |- |
| + | |4 || 4s || $900 || $1,100 || $1,400 || $1,800 || $2,300 || $7,500 |
||
| − | | |
||
| − | | |
+ | |- |
| + | |5 || 3.5s || $1,100 || $1,300 || $1,600 || $2,000 || $2,500 || $8,500 |
||
| − | | |
||
|} |
|} |
||
| − | === |
+ | === Unique === |
| + | A few ships have other unique perks: |
||
| − | Increases the amount of credits that will be carried over to your next run. |
||
| + | ===== [[File:Perks-Drones.png]] Drone Efficiency ===== |
||
| − | Requirements: Rare Loot Chance, Credit Loot Bonus. |
||
| + | Improves Drone Deployment. It has five levels. This upgrade is available only the the Gunship. [[File:Icons-Gunship.png|50px]] |
||
{| class="wikitable" |
{| class="wikitable" |
||
| + | ! rowspan="2" | Level |
||
| − | !Colonial |
||
| + | ! rowspan="2" | Effect |
||
| − | Interceptor |
||
| + | ! colspan="6" | Cost |
||
| − | !Store |
||
| − | Credits |
||
| − | !Cost |
||
|- |
|- |
||
| + | ! Part 1 !! Part 2 !! Part 3 !! Part 4 !! Part 5 !! Total |
||
| − | |1st. Level |
||
| − | |5% |
||
| − | | |
||
|- |
|- |
||
| + | | 1 || Increases drone limit from 1 to 2. || $200 || $400 || $700 || $1,000 || N/A || $2,300 |
||
| − | |2nd. Level |
||
| − | |10% |
||
| − | |$600 |
||
|- |
|- |
||
| + | | 2 || Deployed Drones will come equipped with adaptive armor. || $500 || $700 || $1,000 || $1,400 | $1,900 || N/A || $5,500 |
||
| − | |3rd. Level |
||
| − | |15% |
||
| − | |$800 |
||
|- |
|- |
||
| + | | 3 || Increase Drone Limit from 2 to 3. || $700 || $900 || $1200 || $1600 || $2100 || $6,500 |
||
| − | |4th. Level |
||
| − | |20% |
||
| − | |$1,000 |
||
|- |
|- |
||
| + | | 4 || Deployed Drones will come equipped with adaptive armor and shields. || $900 || $1,100 || $1,400 || $1,800 || $2,300 || $7,500 |
||
| − | |5th. Level |
||
| − | |25% |
||
| − | |$1,400 |
||
|- |
|- |
||
| + | | 5 || Deployed Drones will regenerate 10% hull hitpoints after jumping. || $1,100 || $1,300 || $1,600 || $2,000 || $2,500 || $8,500 |
||
| − | |6th. Level |
||
| − | |30% |
||
| − | |$2,000 |
||
| − | |- |
||
| − | |7th. Level |
||
| − | |35% |
||
| − | |$3,000 |
||
|} |
|} |
||
| + | ===== [[File:Perks-FastHack.png]] Fast Hacking ===== |
||
| − | === Bonus Equipment (6 levels) === |
||
| + | Increases the speed of hacking. You start with 0%, and it has 5 levels. This perk is unique to the Sentinel. [[File:Icons-Sentinel.png|50px]] |
||
| − | Lets you choose additional random equipment before each run. |
||
| − | Requirements: Primary Weapons Slots, Secondary Weapons Slots, Device Slots. |
||
{| class="wikitable" |
{| class="wikitable" |
||
| + | ! Level !! Speed !! Cost |
||
| − | !Colonial |
||
| − | Interceptor |
||
| − | !Bonus Equipment |
||
| − | !Cost |
||
| − | Part1 |
||
| − | !Cost |
||
| − | Part2 |
||
| − | !Cost |
||
| − | Part3 |
||
| − | !Cost |
||
| − | Part4 |
||
| − | !Cost |
||
| − | Part5 |
||
|- |
|- |
||
| + | | 1 || 10% || $1,000 |
||
| − | |1st. Level |
||
| − | |Lets you choose additional random |
||
| − | equipment before each run (1 or 1) |
||
| − | |$200 |
||
| − | |$400 |
||
| − | |$600 |
||
| − | |$800 |
||
| − | |N/A |
||
|- |
|- |
||
| + | | 2 || 20% || $1,000 |
||
| − | |2nd. Level |
||
| − | |Increases the quality |
||
| − | of the bonus equipment (1 or 1) |
||
| − | |$300 |
||
| − | |$500 |
||
| − | |$800 |
||
| − | |$1,200 |
||
| − | |$1,700 |
||
|- |
|- |
||
| + | | 3 || 30% || $2,000 |
||
| − | |3rd. Level |
||
| − | |Increases the quality |
||
| − | of the bonus equipment (2 or 2) |
||
| − | |$500 |
||
| − | |$700 |
||
| − | |$1,000 |
||
| − | |$1,400 |
||
| − | |$1,900 |
||
|- |
|- |
||
| + | | 4 || 40% || $4,000 |
||
| − | |4th. Level |
||
| − | |Increases the quality |
||
| − | of the bonus equipment (2 or 2) |
||
| − | |$700 |
||
| − | |$900 |
||
| − | |$1,200 |
||
| − | |$1,600 |
||
| − | |$2,100 |
||
|- |
|- |
||
| + | | 5 || 50% || $6,500 |
||
| − | |5th. Level |
||
| + | |} |
||
| − | |Adds a third offer |
||
| + | |||
| − | |$900 |
||
| + | ===== [[File:Perks-Mods.png]] Mod Slots ===== |
||
| − | |$1,100 |
||
| + | Increase the number of modifications that can be installed. You start with 3 modifications. It has 2 levels. This perk is unique to the Sentinel. [[File:Icons-Sentinel.png|50px]] |
||
| − | |$1,400 |
||
| + | |||
| − | |$1,800 |
||
| + | {| class="wikitable" |
||
| − | | |
||
| + | ! Level !! Slots !! Cost |
||
|- |
|- |
||
| + | | 1 || Four for primary weapons || $6,000 |
||
| − | |6th. Level |
||
| + | |- |
||
| − | |Allows one re-roll of equipment offered |
||
| + | | 2 || Four for devices || $8,000 |
||
| − | | |
||
| − | | |
||
| − | | |
||
| − | | |
||
| − | | |
||
|} |
|} |
||
| + | |||
| − | [[Category:Perks| ]] |
||
| + | == External Links == |
||
| − | [[Category:Everspace]] |
||
| + | * [https://docs.google.com/spreadsheets/d/1JQalspiGtk5vsjG7oml-Z8w1kGtLkn-aUGPgJXQU66c/edit#gid=1292184591 EVERSPACE Details spreadsheet on Google Docs – Perk Upgrade Table] |
||
| + | [[Category:Mechanics]] |
||
Latest revision as of 04:59, 13 February 2022
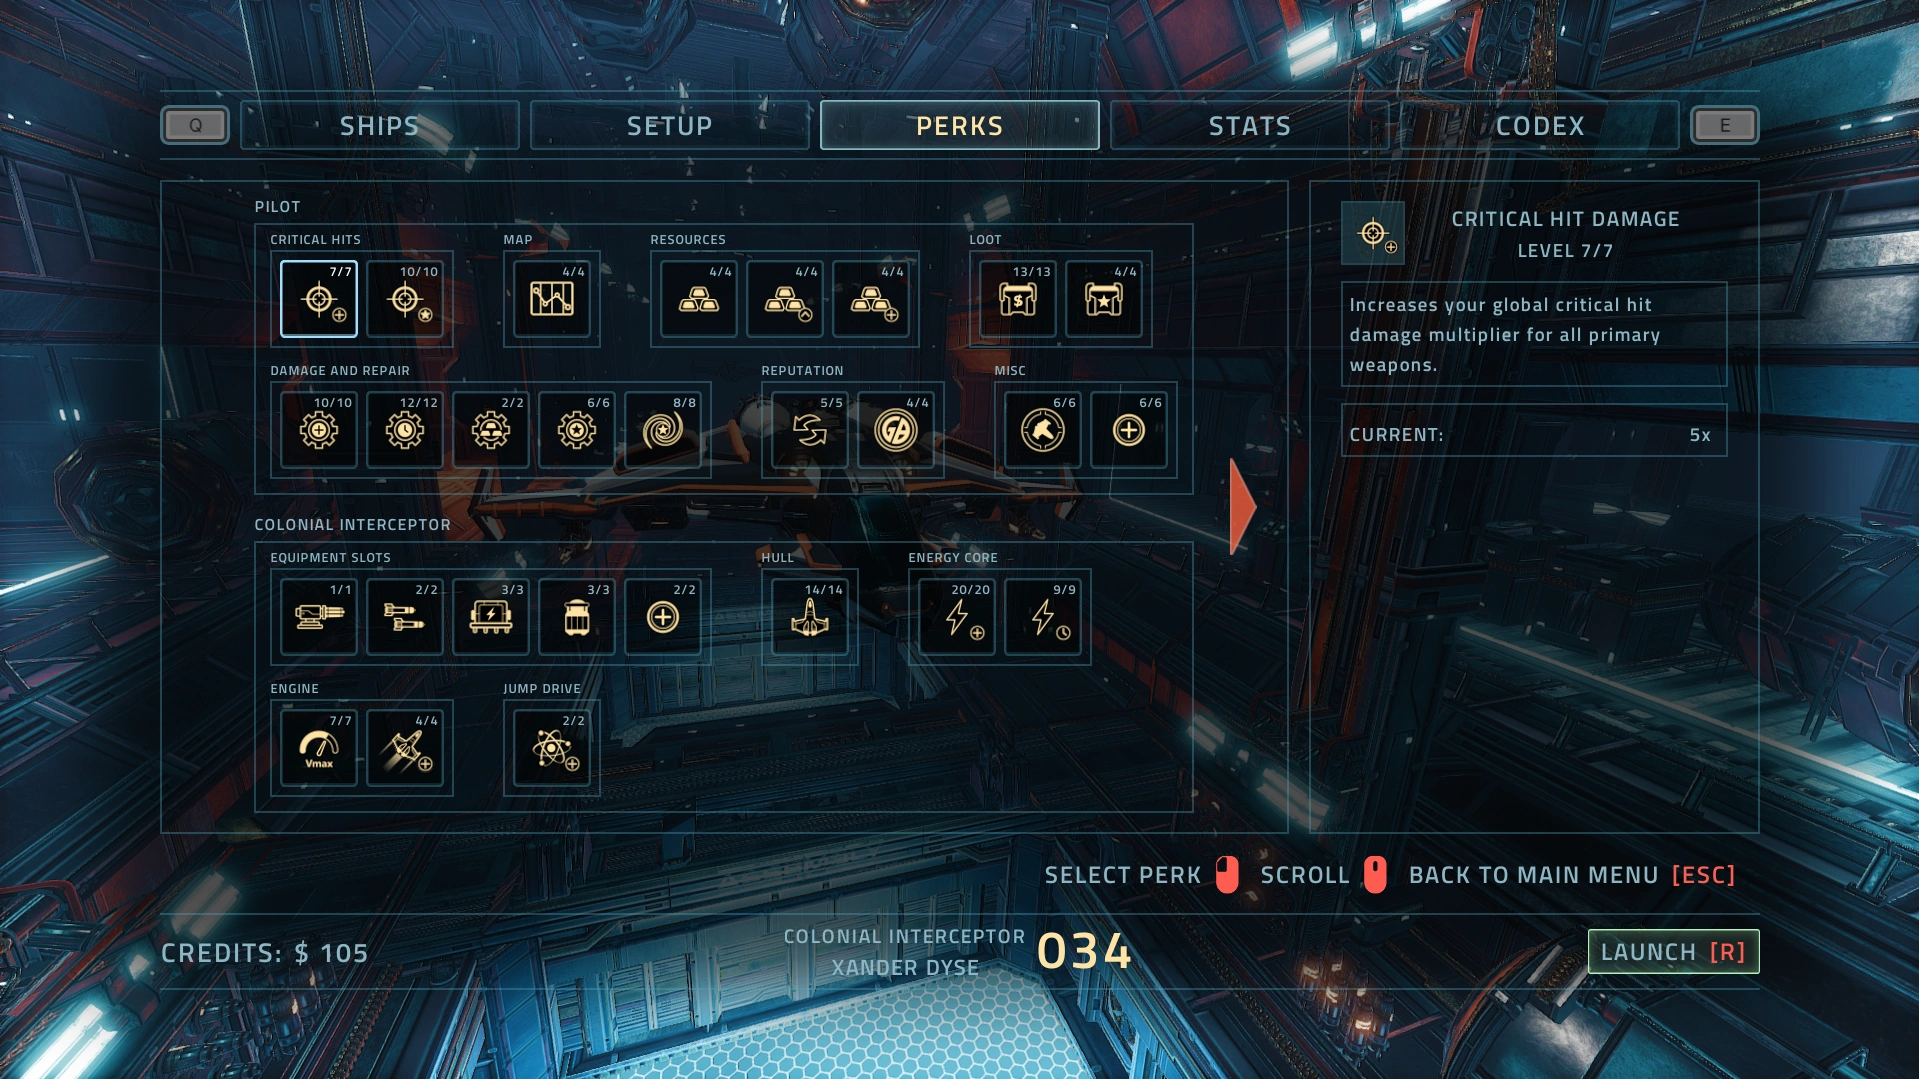
Perks screen with Colonial Interceptor selected.
| For perks in Everspace 2, see Perks (ES2). |
Perks can be leveled up prior to a game run using credits, and are permanent upgrades across all runs. They affect almost all aspects of each run and how strong each ship is, and with no downsides other than spending credits. Some ship perks even have visual upgrades, changing the look of one of the parts of a ship. For images of the visual changes, please see each respective ship's pages.
Upgrading all perks in the game costs $1,429,050 (including the Colonial Sentinel's perks; $1,186,400 without it).
Pilot Perks[ | ]
Pilot perks go across all ship types and affect non-ship specific aspects of each run. There are currently 17 different pilot perks across seven different groups of perks. Maxing out all Pilot perks awards the Perked Up Achievement. In total, maxing out all pilot perks costs $450,600 credits.
Critical Hits[ | ]
There are two critical hit perks.
 Critical Hit Damage[ | ]
Increases your global hit damage multiplier for all Primary Weapons. You start with a 2x damage multiplier. It has seven levels, and has a total cost of $20,600 credits.
Requirements: Primary Weapons Slots, Device Slots, Critical Hit Chance.
| Level | Damage Multipier | Cost |
|---|---|---|
| 1 | 2.5x | $300 |
| 2 | 2.75x | $800 |
| 3 | 3x | $1,500 |
| 4 | 3.5x | $2,500 |
| 5 | 4x | $3,500 |
| 6 | 4.5x | $5,000 |
| 7 | 5x | $7,000 |
 Critical Hit Chance[ | ]
Increases your critical hit chance for all Primary Weapons. Without this perk, you have a 0% chance. It has ten levels, and has a total cost of $21,100 credits.
Requirements: Primary Weapons Slots, Device Slots.
| Level | Chance | Cost |
|---|---|---|
| 1 | 0.5% | $500 |
| 2 | 1% | $700 |
| 3 | 1.5% | $900 |
| 4 | 2% | $1,500 |
| 5 | 2.5% | $2,000 |
| 6 | 3% | $2,200 |
| 7 | 3.5% | $2,800 |
| 8 | 4% | $3,000 |
| 9 | 4.5% | $3,500 |
| 10 | 5% | $4,000 |
Map[ | ]
There is only one perk for upgrading the sector map.
Sector Scanner[ | ]
Adds additional information to the sector map. It has four levels, with multiple parts to buy to unlock each level, and has a total cost of $18,800 credits.
| Level | Sector Information | Cost | |||||
|---|---|---|---|---|---|---|---|
| Part 1 | Part 2 | Part 3 | Part 4 | Part 5 | Total | ||
| 1 | Shows threat levels on the sector map. | $200 | $400 | $700 | $1,000 | N/A | $2,300 |
| 2 | Shows natural hazards on the sector map. | $300 | $500 | $800 | $1,200 | $1,700 | $4,500 |
| 3 | Shows traders on the sector map. | $500 | $700 | $1,000 | $1,400 | $1,900 | $5,500 |
| 4 | Shows Service Stations on the sector map. | $700 | $900 | $1,200 | $1,600 | $2,100 | $6,500 |
Resources[ | ]
There are three resource perks:
Crafting Costs[ | ]
Decreases the amount of resources needed for crafting. It has four levels and a total cost of $28,000 credits.
Requirements: Consumable Slots, Device Slots.
| Level | Percent Decrease | Cost |
|---|---|---|
| 1 | 10% | $4,000 |
| 2 | 15% | $6,000 |
| 3 | 20% | $8,000 |
| 4 | 25% | $10,000 |
Mining Yield[ | ]
Increases the amount of resources gained from mining. It has four levels and costs a total of $28,000 credits.
Requirements: Crafting Costs, Consumable Slots, Device Slots.
| Level | Percent Increase | Cost |
|---|---|---|
| 1 | 10% | $4,000 |
| 2 | 15% | $6,000 |
| 3 | 20% | $8,000 |
| 4 | 25% | $10,000 |
Bonus Resources[ | ]
Lets you start a run with additional random resources on board. It has four levels and costs a total of $24,000 credits.
Requirements: Rare Loot Chance, Credit Loot Bonus.
| Level | Bonus Resources | Cost | |||||
|---|---|---|---|---|---|---|---|
| Part 1 | Part 2 | Part 3 | Part 4 | Part 5 | Total | ||
| 1 | Add resources worth $500 to your ship | $300 | $500 | $800 | $1,200 | $1,700 | $4,500 |
| 2 | Add resources worth $1,000 to your ship | $500 | $700 | $1,000 | $1,400 | $1,900 | $5,500 |
| 3 | Add resources worth $1,500 to your ship | $700 | $900 | $1,200 | $1,600 | $2,100 | $6,500 |
| 4 | Add resources worth $2,000 to your ship | $900 | $1,100 | $1,400 | $1,800 | $2,300 | $7,500 |
Loot[ | ]
There are 2 loot perks:
Credit Loot Bonus[ | ]
Increases the amount of credits found. It has thirteen levels and a total cost of $39,000 credits.
| Level | Percent Increase | Cost |
|---|---|---|
| 1 | 2% | $200 |
| 2 | 3% | $300 |
| 3 | 5% | $500 |
| 4 | 7% | $800 |
| 5 | 10% | $1,200 |
| 6 | 13% | $1,700 |
| 7 | 17% | $2,300 |
| 8 | 21% | $3,000 |
| 9 | 26% | $3,800 |
| 10 | 30% | $4,700 |
| 11 | 35% | $5,700 |
| 12 | 41% | $6,800 |
| 13 | 50% | $8,000 |
Rare Loot Chance[ | ]
Increases the chance of finding better loot. It has four levels and a total cost of $24,500 credits.
Requirements: Credit Loot Bonus.
| Level | Chance | Cost |
|---|---|---|
| 1 | 2.5% | $2,500 |
| 2 | 5% | $5,000 |
| 3 | 7.5% | $7,000 |
| 4 | 10% | $10,000 |
Damage And Repair[ | ]
There are four damage and repair perks:
Nanobot Efficiency[ | ]
Increases the amount of hull hitpoints repaired by one nanobot. Without any levels invested, nanobots repair 35 hull hitpoints. It has ten levels and a total cost of $15,200 credits.
| Level | Hitpoints Repaired | Cost |
|---|---|---|
| 1 | 36 | $500 |
| 2 | 37 | $600 |
| 3 | 38 | $800 |
| 4 | 39 | $1,000 |
| 5 | 40 | $1,200 |
| 6 | 41 | $1,500 |
| 7 | 42 | $1,800 |
| 8 | 43 | $2,100 |
| 9 | 44 | $2,600 |
| 10 | 45 | $3,100 |
Hitpoint Repair Rate[ | ]
Increases the speed of repairing your hull (after using nanobots). It has twelve levels and a total cost of $39,000 credits.
| Level | Repair rate | Cost |
|---|---|---|
| 1 | 27/s | $500 |
| 2 | 30/s | $1,000 |
| 3 | 35/s | $1,500 |
| 4 | 40/s | $2,000 |
| 5 | 45/s | $2,500 |
| 6 | 50/s | $3,000 |
| 7 | 55/s | $3,500 |
| 8 | 60/s | $4,000 |
| 9 | 65/s | $4,500 |
| 10 | 70/s | $5,000 |
| 11 | 75/s | $5,500 |
| 12 | 80/s | $6,000 |
Component Damage Repair Costs[ | ]
Decreases the costs of repairing damaged ship components. It only has two levels, though each level requires buying multiple parts, and has a total cost of $28,000 credits.
| Level | Percent Reduction | Cost | |||||
|---|---|---|---|---|---|---|---|
| Part 1 | Part 2 | Part 3 | Part 4 | Total | |||
| 1 | 20% | $1,000 | $2,000 | $3,000 | $4,000 | $10,000 | |
| 2 | 40% | $3,000 | $4,000 | $5,000 | $6,000 | $18,000 | |
Component Damage Chance[ | ]
Decreases the probability of ship component damage. It has six levels and a total cost of $24,000 credits.
| Level | Percent Chance Reduction | Cost |
|---|---|---|
| 1 | 5% | $500 |
| 2 | 10% | $1,000 |
| 3 | 20% | $2,000 |
| 4 | 30% | $4,000 |
| 5 | 40% | $6,500 |
| 6 | 50% | $10,000 |
Lucky Jump Chance[ | ]
Increases the chance of surviving a jump with insufficient fuel unscathed. Without this perk, there is a 25% chance of avoiding all damage. It has eight levels and a total cost of $27,000 credits.
| Level | Chance | Cost |
|---|---|---|
| 1 | 27.5% | $1,000 |
| 2 | 30% | $1,500 |
| 3 | 32,5% | $2,000 |
| 4 | 35% | $2,500 |
| 5 | 37.5% | $3,000 |
| 6 | 40% | $3,500 |
| 7 | 45% | $5,500 |
| 8 | 60% | $8,000 |
Reputation[ | ]
There are two reputation perks.
Trading[ | ]
Get more out of traders and service stations. It has five levels, each level requiring buying of multiple parts, and has a total cost of $26,300 credits.
| Level | Effects | Cost | |||||
|---|---|---|---|---|---|---|---|
| Part 1 | Part 2 | Part 3 | Part 4 | Part 5 | Total | ||
| 1 | Service stations offer two services. | $200 | $400 | $700 | $1,000 | N/A | $2,300 |
| 2 | Traders and service stations occasionally buy resources. | $300 | $500 | $800 | $1,200 | $1,700 | $4,500 |
| 3 | Service stations offer three services. | $500 | $700 | $1,000 | $1,400 | $1,900 | $5,500 |
| 4 | Increases fuel and repair capacity of service stations. | $700 | $900 | $1,200 | $1,600 | $2,100 | $6,500 |
| 5 | Service stations and traders have more offers | $900 | $1,100 | $1,400 | $1,800 | $2,300 | $7,500 |
Diplomacy[ | ]
Improves your standing with G&B. It has four levels and a total cost of $18,800 credits.
| Level | Effects | Cost | |||||
|---|---|---|---|---|---|---|---|
| Part 1 | Part 2 | Part 3 | Part 4 | Part 5 | Total | ||
| 1 | Reduce the chance of G&B units reporting your attacks. | $200 | $400 | $700 | $1,000 | N/A | $2,300 |
| 2 | Further reduce the chance of G&B units reporting your attacks. | $300 | $500 | $800 | $1,200 | $1,700 | $4,500 |
| 3 | G&B fighters will occasionally jump in to aid you in fighting outlaws. | $500 | $700 | $1,000 | $1,400 | $1,900 | $5,500 |
| 4 | G&B fighters will more often jump in to aid you in fighting outlaws. | $700 | $900 | $1,200 | $1,600 | $2,100 | $6,500 |
Miscellaneous[ | ]
There are two miscellaneous perks.
Retrieval[ | ]
Reveals the location of your last clone's shipwreck on the map and lets you salvage it. It has six levels and a total cost of $26,300 credits.
Requirements: Store Credits, Rare Loot Chance, Credit Loot Bonus.
| Level | Retrieval | Cost | |||||
|---|---|---|---|---|---|---|---|
| Part 1 | Part 2 | Part 3 | Part 4 | Part 5 | Total | ||
| 1 | Reveals the location of your last clone's ship wreck. | $200 | $400 | $700 | $1,000 | N/A | $2,300 |
| 2 | Adds chance to retrieve primary and secondary weapons. | $300 | $500 | $800 | $1,200 | $1,700 | $4,500 |
| 3 | Adds chance to retrieve fuel. | $500 | $700 | $1,000 | $1,400 | $1,900 | $5,500 |
| 4 | Adds chance to retrieve devices and consumables | $700 | $900 | $1,200 | $1,600 | $2,100 | $6,500 |
| 5 | Increases chances of retrieving anything. | $900 | $1,100 | $1,400 | $1,800 | $2,300 | $7,500 |
| 6 | Retrieve at least one piece of equipment of each category (primary, secondary, devices, consumables). | $1,000 | $1,200 | $1,500 | $1,900 | $2,500 | $8,100 |
Bonus Equipment[ | ]
Lets you choose additional random equipment before each run. It has six levels and a total cost of $34,400 credits.
Requirements: Primary Weapons Slots, Secondary Weapons Slots, Device Slots.
| Level | Bonus Equipment | Cost | |||||
|---|---|---|---|---|---|---|---|
| Part 1 | Part 2 | Part 3 | Part 4 | Part 5 | Total | ||
| 1 | Lets you choose additional random equipment before each run (two offers). | $200 | $400 | $700 | $1,000 | N/A | $2,300 |
| 2 | Increases the quality of the bonus equipment. | $300 | $500 | $800 | $1,200 | $1,700 | $4,500 |
| 3 | Adds a second item to each offer. | $500 | $700 | $1,000 | $1,400 | $1,900 | $5,500 |
| 4 | Increases the quality of the bonus equipment. | $700 | $900 | $1,200 | $1,600 | $2,100 | $6,500 |
| 5 | Adds a third offer. | $900 | $1,100 | $1,400 | $1,800 | $2,300 | $7,500 |
| 6 | Allows one re-roll of equipment offered. | $1,000 | $1,200 | $1,500 | $1,900 | $2,500 | $8,100 |
Ship Perks[ | ]
Each player ship has different perks specific to only them. Some perks are the same type across each type of ship, but have different levels and/or costs. Ship Perks are not global like Pilot Perks so they must be purchased on each ship individually. Maxing all perks on any of the three original ships unlocks the Tinkerer Achievement.
![]() The Colonial Gunship has 13 different perks in six different groups. The total cost of all Gunship perks is $276,650 credits.
The Colonial Gunship has 13 different perks in six different groups. The total cost of all Gunship perks is $276,650 credits.
![]() The Colonial Interceptor has eleven perks across five different groups. Fully upgrading the Interceptor costs a total of $243,850 credits.
The Colonial Interceptor has eleven perks across five different groups. Fully upgrading the Interceptor costs a total of $243,850 credits.
![]() The Colonial Scout has 12 different perks in six different groups. The total cost of all perks for the Scout is $215,300 credits.
The Colonial Scout has 12 different perks in six different groups. The total cost of all perks for the Scout is $215,300 credits.
![]() The Colonial Sentinel is a ship that is unlocked with the Encounters expansion. It has 12 perks across 7 different groups. Maxing out all perks for the Sentinel unlocks the Tuned To The Max achievement. The total cost of all Sentinel perks is $242,650 credits.
The Colonial Sentinel is a ship that is unlocked with the Encounters expansion. It has 12 perks across 7 different groups. Maxing out all perks for the Sentinel unlocks the Tuned To The Max achievement. The total cost of all Sentinel perks is $242,650 credits.
Equipment Slots[ | ]
There are five equipment perks:
Primary Weapons Slots[ | ]
The number of different primary weapon systems your ship can carry. The Scout and Sentinel are unable to gain more primary slots meaning they max at two and one weapon slots respectively. The Interceptor can be upgraded to a max of three weapons, while the Gunship can be upgraded to carry four.
Requirements: Device Slots.
| Level | Slots | Availability | Cost | |||||
|---|---|---|---|---|---|---|---|---|
| Part 1 | Part 2 | Part 3 | Part 4 | Part 5 | Total | |||
| 1 | Three | $200 | $400 | $600 | $800 | N/A | $2,000 | |
| 2 | Four | $500 | $800 | $1,200 | $1,500 | $2,000 | $6,000 | |
Secondary Weapon Slots[ | ]
The number of different secondary weapons systems your ship can carry. The Gunship begins with two slots, while the Interceptor, Scout, and Sentinel all begin with one.
Requirements: Primary Weapons Slots (![]() ,
, ![]() ), Device Slots.
), Device Slots.
| Level | Extra Slots | Availability | Cost | |||||
|---|---|---|---|---|---|---|---|---|
| Part 1 | Part 2 | Part 3 | Part 4 | Part 5 | Total | |||
| 1 | One | $200 | $400 | $600 | $800 | N/A | $2,000 | |
| 2 | Two | $500 | $800 | $1,200 | $1,500 | $2,000 | $6,000 | |
| 3 | Three | $1,000 | $1,500 | $2,000 | $2,500 | $3,500 | $10,500 | |
Device Slots[ | ]
The number of different devices your ship can carry. The Gunship and Interceptor begin with two slots, The Scout and Sentinel begin with three.
| Level | Extra Slots | Availability | Cost | |||||
|---|---|---|---|---|---|---|---|---|
| Part 1 | Part 2 | Part 3 | Part 4 | Part 5 | Total | |||
| 1 | One | $200 | $400 | $600 | $800 | N/A | $2,000 | |
| 2 | Two | $500 | $800 | $1,200 | $1,500 | $2,000 | $6,000 | |
| 3 | Three | $1,000 | $1,500 | $2,000 | $2,500 | $3,500 | $10,500 | |
Consumable Slots[ | ]
The number of different consumables your ship can carry. The Gunship begins with three, the Interceptor, Scout, and Sentinel begin with two.
Requirements: Device Slots.
| Level | Extra Slots | Availability | Cost | |||||
|---|---|---|---|---|---|---|---|---|
| Part 1 | Part 2 | Part 3 | Part 4 | Part 5 | Total | |||
| 1 | One | $200 | $400 | $600 | $800 | N/A | $2,000 | |
| 2 | Two | $500 | $800 | $1,200 | $1,500 | $2,000 | $6,000 | |
| 3 | Three | $1,000 | $1,500 | $2,000 | $2,500 | $3,500 | $10,500 | |
Enhancement Slots[ | ]
The amount of different Subroutines or Glyphs your ship can carry. All ships begin with one slot and can gain two more at a total cost of $24,000 credits.
Requirements: Device Slots, Consumable Slots.
| Level | Slots | Cost |
|---|---|---|
| 1 | Two | $8,000 |
| 2 | Three | $16,000 |
Sensors[ | ]
There is a single Sensors perk, which is unique to the Scout. ![]()
Sensor Range[ | ]
Increases your sensor's range.
Requirements: Hull Hitpoints.
| Level | Range Increase | Cost | Visual Upgrade |
|---|---|---|---|
| 1 | 5% | $1,000 | |
| 2 | 10% | $1,500 | ✓ |
| 3 | 15% | $2,200 | |
| 4 | 20% | $3,500 | ✓ |
Hull[ | ]
There are two Hull perks:
Hull Hitpoints[ | ]
Increases your ship's hull hitpoints. The Gunship begins with 1,090 Hitpoints, The Interceptor with 450, and the Sentinel with 300. The Scout's Hull cannot be upgraded.
| Level | Cost | |||
|---|---|---|---|---|
| 1 | 1,105 | 465 | 310 | $200 |
| 2 | 1,120 | 480 | 330 | $500 |
| 3 | 1,135 | 495 | 345 | $800 |
| 4 | 1,150 | 510 | 360 | $1,200 |
| 5 | 1,165 | 525 | 375 | $1,550 |
| 6 | 1,180 | 540 | 390 | $1,700 |
| 7 | 1,195 | 555 | 405 | $1,850 |
| 8 | 1,210 | 570 | 420 | $2,000 |
| 9 | 1,225 | 585 | 435 | $2,200 |
| 10 | 1,240 | 600 | 450 | $2,400 |
| 11 | 1,255 | 615 | N/A | $2,650 |
| 12 | 1,270 | 630 | N/A | $2,900 |
| 13 | 1,285 | 645 | N/A | $3,200 |
| 14 | 1,300 | 660 | N/A | $3,500 |
| Total | $26,650 | $26,650 | $14,400 |
Armor[ | ]
Reduces all damage dealt to your hull by a specific percentage. Unique to the Gunship, it has 10 levels and you start with 35% damage reduction. ![]()
| Level | Damage Reduction | Cost |
|---|---|---|
| 1 | 36% | $500 |
| 2 | 37% | $1,000 |
| 3 | 38% | $2,000 |
| 4 | 39% | $3,000 |
| 5 | 40% | $4,000 |
Energy Core[ | ]
There are two Energy Core perks:
Energy Capacity[ | ]
Increases the total energy capacity. The Gunship starts with 140, the Interceptor with 100, the Scout with 75, and the Sentinel with 135. All Ships recieve visual upgrades at levels 5 and 10.
| Level | Cost | ||||
|---|---|---|---|---|---|
| 1 | 145 | 105 | 80 | 142 | $200 |
| 2 | 150 | 110 | 85 | 150 | $500 |
| 3 | 155 | 115 | 90 | 157 | $800 |
| 4 | 160 | 120 | 95 | 165 | $1,200 |
| 5 | 165 | 125 | 100 | 172 | $1,550 |
| 6 | 170 | 130 | 105 | 180 | $1,700 |
| 7 | 175 | 135 | 110 | 187 | $1,850 |
| 8 | 180 | 140 | 115 | 195 | $2,000 |
| 9 | 185 | 145 | 120 | 202 | $2,200 |
| 10 | 190 | 150 | 125 | 210 | $2,400 |
| 11 | 195 | 155 | 130 | 217 | $2,650 |
| 12 | 200 | 160 | 140 | 225 | $2,900 |
| 13 | 205 | 165 | 145 | 232 | $3,200 |
| 14 | 210 | 170 | 150 | 240 | $3,500 |
| 15 | 215 | 175 | N/A | 247 | $3,850 |
| 16 | 220 | 180 | N/A | 255 | $4,250 |
| 17 | 225 | 185 | N/A | N/A | $4,700 |
| 18 | 230 | 190 | N/A | N/A | $5,200 |
| 19 | 235 | 195 | N/A | N/A | $5,750 |
| 20 | 240 | 200 | N/A | N/A | $6,300 |
| Total | $56,700 | $56,700 | $30,500 | $38,600 |
Energy Regeneration[ | ]
Increases the speed of energy regeneration. The interceptor begins with a regen rate of 5.00/s, while all the others start at 6.00/s
Requirements: Energy Capacity.
| Level | Cost | ||||
|---|---|---|---|---|---|
| 1 | 6.5/s | 5.5/s | 6.5/s | 6.5/s | $500 |
| 2 | 7.0/s | 6.0/s | 7.0/s | 7.0/s | $700 |
| 3 | 7.5/s | 6.5/s | 7.5/s | 7.5/s | $900 |
| 4 | 8.0/s | 7.0/s | 8.0/s | 8.0/s | $1,200 |
| 5 | 8.5/s | 7.5/s | 8.5/s | 8.5/s | $1,500 |
| 6 | 9.0/s | 8.0/s | 9.0/s | 9.0/s | $1,900 |
| 7 | 9.5/s | 8.5/s | 9.5/s | 9.5/s | $2,400 |
| 8 | N/A | 9.0/s | 10.0/s | 10.0/s | $3,000 |
| 9 | N/A | 9.5/s | 10.5/s | 10.5/s | $4,000 |
| 10 | N/A | N/A | 11.0/s | 11.0/s | $5,000 |
| 11 | N/A | N/A | 12.0/s | 12.0/s | $5,500 |
| 12 | N/A | N/A | N/A | 12.5/s | $6,000 |
| 13 | N/A | N/A | N/A | 13.0/s | $6,500 |
| Total | $9,100 | $16,100 | $26,600 | $39,100 |
Engine[ | ]
There are two Engine perks:
Max Speed[ | ]
Increases the maximum speed of your ship. The Gunship starts with a speed of 110m/s, the Interceptor at 120m/s, the Scout at 130m/s, and the sentinel at 120m/s. All ships recieve visual upgrades at levels three and seven and the Interceptor recieves further upgrades at every level after the first.
Requirements: Hull Hitpoints.
| Level | Cost | ||||
|---|---|---|---|---|---|
| 1 | 113m/s | 123m/s | 133m/s | 123m/s | $700 |
| 2 | 116m/s | 126m/s | 136m/s | 126m/s | $1,200 |
| 3 | 119m/s | 129m/s | 139m/s | 129m/s | $2,000 |
| 4 | 122m/s | 132m/s | 142m/s | 132m/s | $3,000 |
| 5 | 125m/s | 135m/s | 145m/s | 135m/s | $5,000 |
| 6 | 128m/s | 138m/s | 148m/s | 138m/s | $7,000 |
| 7 | 130m/s | 140m/s | 150m/s | 140m/s | $9,000 |
| Total | $27,900 | $27,900 | $27,900 | $27,900 |
Boost Speed[ | ]
Increases the speed of your ship while boosting. All ships receive visual upgrades at their second and last available levels.
Requirements: Max Speed, Hull Hitpoints.
| Level | Cost | ||||
|---|---|---|---|---|---|
| 1 | 2.45x | 2.6x | 3.1x | 2.5x | $2,000 |
| 2 | 2.55x | 2.7x | 3.2x | 2.6x | $3,500 |
| 3 | 2.65x | 2.8x | 3.3x | 2.7x | $5,000 |
| 4 | N/A | 2.9x | 3.4x | 2.8x | $7,000 |
| 5 | N/A | N/A | 3.5x | N/A | $10,000 |
| Total | $10,500 | $17,500 | $27,500 | $17,500 |
Jump Drive[ | ]
There are two Jump Drive perks:
Fuel Capacity[ | ]
Extends your fuel tank, increasing the maximum number of jumps. All ships start with four jumps and a tank holding 100 fuel.
Requirements: Energy Capacity.
| Level | Jumps | Availability | Cost | |||||
|---|---|---|---|---|---|---|---|---|
| Part 1 | Part 2 | Part 3 | Part 4 | Total | ||||
| 1 | Five | $1,000 | $2,000 | $3,000 | $4,000 | $10,000 | ||
| 2 | Six | $3,000 | $4,000 | $5,000 | $6,000 | $18,000 | ||
Jump Charge Time[ | ]
Decreases the time your jump drive needs to charge before triggering the jump. It starts with a six second jump time. This upgrade is unique to the Scout. ![]()
| Level | Time | Cost | |||||
|---|---|---|---|---|---|---|---|
| Part 1 | Part 2 | Part 3 | Part 4 | Part 5 | Total | ||
| 1 | 5.5s | $200 | $400 | $700 | $1,000 | N/A | $2,300 |
| 2 | 5.0s | $500 | $700 | $1,000 | $1,400 | $1,900 | $5,500 |
| 3 | 4.5s | $700 | $900 | $1,200 | $1,600 | $2,100 | $6,500 |
| 4 | 4s | $900 | $1,100 | $1,400 | $1,800 | $2,300 | $7,500 |
| 5 | 3.5s | $1,100 | $1,300 | $1,600 | $2,000 | $2,500 | $8,500 |
Unique[ | ]
A few ships have other unique perks:
Drone Efficiency[ | ]
Improves Drone Deployment. It has five levels. This upgrade is available only the the Gunship. ![]()
| Level | Effect | Cost | |||||
|---|---|---|---|---|---|---|---|
| Part 1 | Part 2 | Part 3 | Part 4 | Part 5 | Total | ||
| 1 | Increases drone limit from 1 to 2. | $200 | $400 | $700 | $1,000 | N/A | $2,300 |
| 2 | Deployed Drones will come equipped with adaptive armor. | $500 | $700 | $1,000 | $1,900 | N/A | $5,500 |
| 3 | Increase Drone Limit from 2 to 3. | $700 | $900 | $1200 | $1600 | $2100 | $6,500 |
| 4 | Deployed Drones will come equipped with adaptive armor and shields. | $900 | $1,100 | $1,400 | $1,800 | $2,300 | $7,500 |
| 5 | Deployed Drones will regenerate 10% hull hitpoints after jumping. | $1,100 | $1,300 | $1,600 | $2,000 | $2,500 | $8,500 |
Fast Hacking[ | ]
Increases the speed of hacking. You start with 0%, and it has 5 levels. This perk is unique to the Sentinel. ![]()
| Level | Speed | Cost |
|---|---|---|
| 1 | 10% | $1,000 |
| 2 | 20% | $1,000 |
| 3 | 30% | $2,000 |
| 4 | 40% | $4,000 |
| 5 | 50% | $6,500 |
Mod Slots[ | ]
Increase the number of modifications that can be installed. You start with 3 modifications. It has 2 levels. This perk is unique to the Sentinel. ![]()
| Level | Slots | Cost |
|---|---|---|
| 1 | Four for primary weapons | $6,000 |
| 2 | Four for devices | $8,000 |